Before beginning to install laminate flooring, there are some preparations you need to make to ensure a successful and smooth installation. The first step is to measure the area you will be laying the flooring in and calculate how much laminate you need. You should also make sure you have the right tools at hand, such as a tape measure, a saw, a mallet, spacers, and adhesive. It’s also important to ensure that the subfloor is in the ideal conditions for installing the flooring. Knowing what size mallet for laminate flooring to use is also essential.
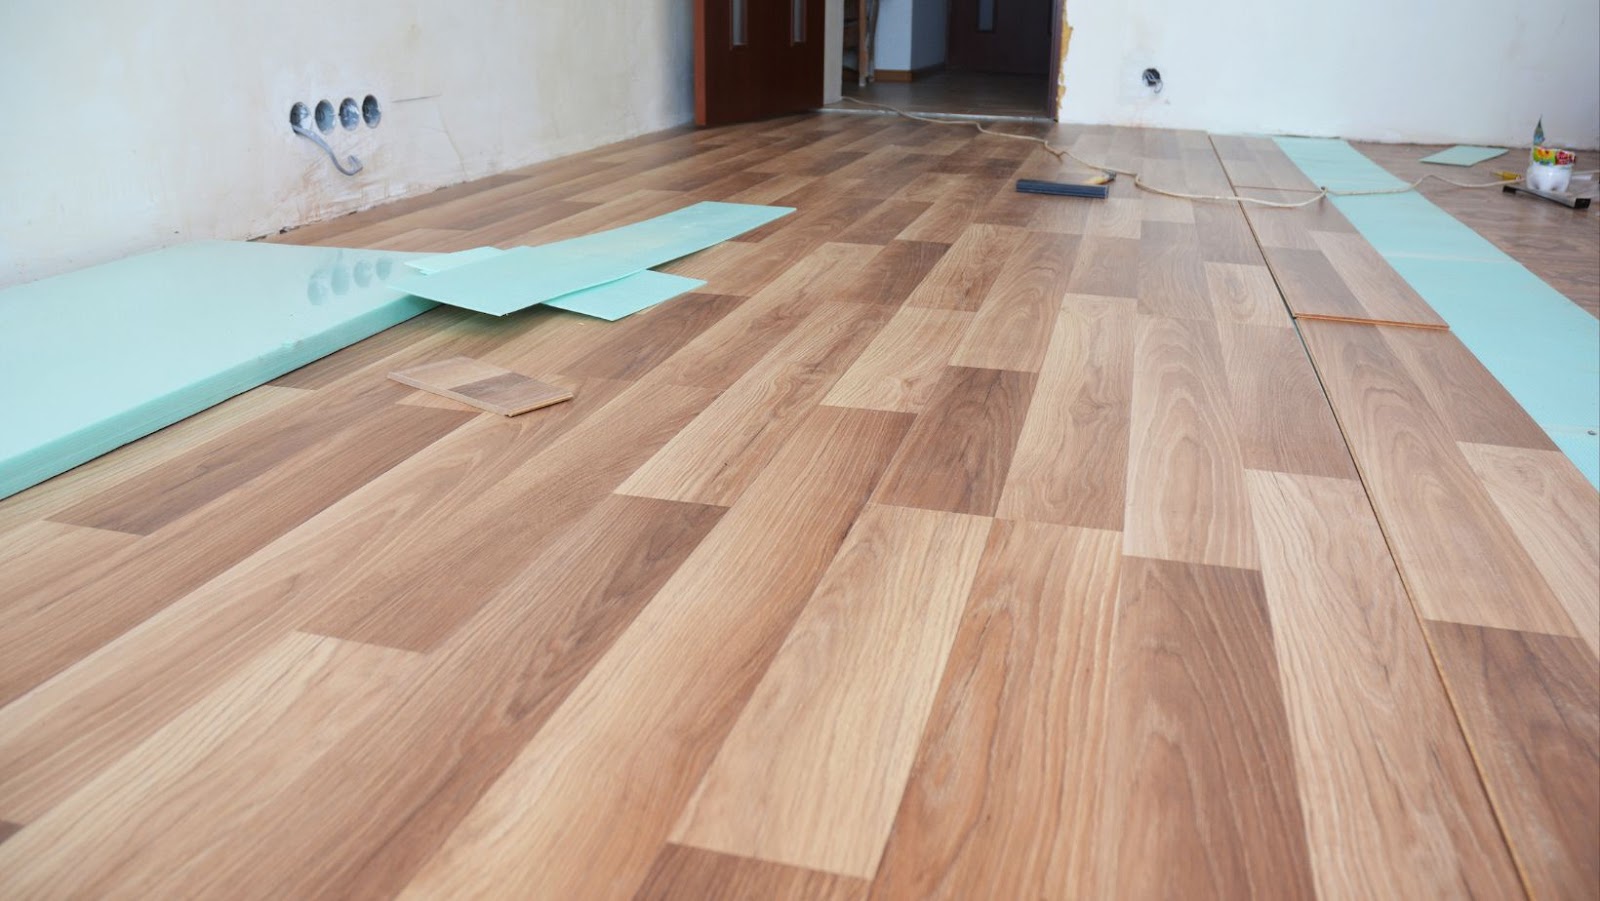
Measure the room
Before installing a laminate floor, it is important that you accurately measure the entire room you plan to cover. This includes measuring from wall-to-wall and door frames to ensure the flooring will fit correctly. Make sure to leave at least an extra 1/4″ on each side for trim installation. It is also a good idea to take note of any obstacles or uneven walls/floors that could affect your installation. Generally speaking, it is best if all walls are at least 90° angles when laying down laminate flooring, although this may not always be possible.
Next, calculate the square footage of the room by multiplying the length by width and use this information to determine how much flooring you will need to purchase. Laminate flooring usually comes in boxes with a certain amount of square footage listed on it – so check with your manufacturer or local store before purchasing materials. Additionally, take into account what size mallet or hammer you may need for installation purposes – generally 3-4 pounds should be enough for most situations.
Calculate the number of laminate planks needed
Before you begin installation, you’ll need to determine the number of laminate planks needed. To do this, use a measuring tape to measure the length and width of the room, then multiply those two figures together. For example, if the length of your room is 12 feet (144 inches) and the width is 10 feet (120 inches), then you need 17,280 square inches total or 143 planks. As a general rule of thumb, allow an extra 10-20% for cutting and wastage.
For installing laminate flooring with a mallet tool successfully, it’s important to choose the right size mallet for the job at hand. The recommended size is typically a 3-pound mallet for lighter duty tasks such as removing trim or door jambs trim from the wall when installing flooring. However, if your work requires more force, adjust accordingly and opt for a larger size–specifically any size from 4-8 pounds will work well. Additionally, make sure to purchase laminate flooring that contains tongue and groove boards for easy fitting when hand tapping with the mallet tool.
What size mallet for laminate flooring
When installing laminate flooring, it is critical to choose the right size mallet for the job. A mallet is a type of hammer used for driving in chisels, carving tools and other objects without damaging the surface you are striking. If the mallet size is too small or large, it could damage the locking system of your planks, resulting in an uneven floor or difficulty laying your next piece.
Before you purchase a mallet, consider a few factors. The first factor is the shape of your floor planks – each type of plank will require a specific head size to properly tap down into place. The second factor is whether or not you will be using spacers during installation – this will help determine if you need to use larger head sizes that distribute pressure more evenly across your space. Finally, consider what type of handle you prefer – shorter handles are often easier to control but longer handles can reach further with less effort.
Regardless of what type and size of mallet you select for laminate installation, always make sure that it fits comfortably in your hand yet still allows enough force for driving the plank into its proper place with precision and accuracy. When installed correctly with care and attention to detail, laminate floors can last for many years without issue. Ultimately choosing the right size mallet for laminate flooring installation saves time and energy while ensuring stylish results every time!
Installation
Installing laminate flooring is a job that many DIYers can do with a little time and patience. The first step is to determine the size of the room and the amount of material you will need. Once you have the correct measurements, you can move on to the installation process. Before you begin, it is important to make sure you have the right tools for the job, such as the appropriate size mallet for laminate flooring.
Lay the underlayment
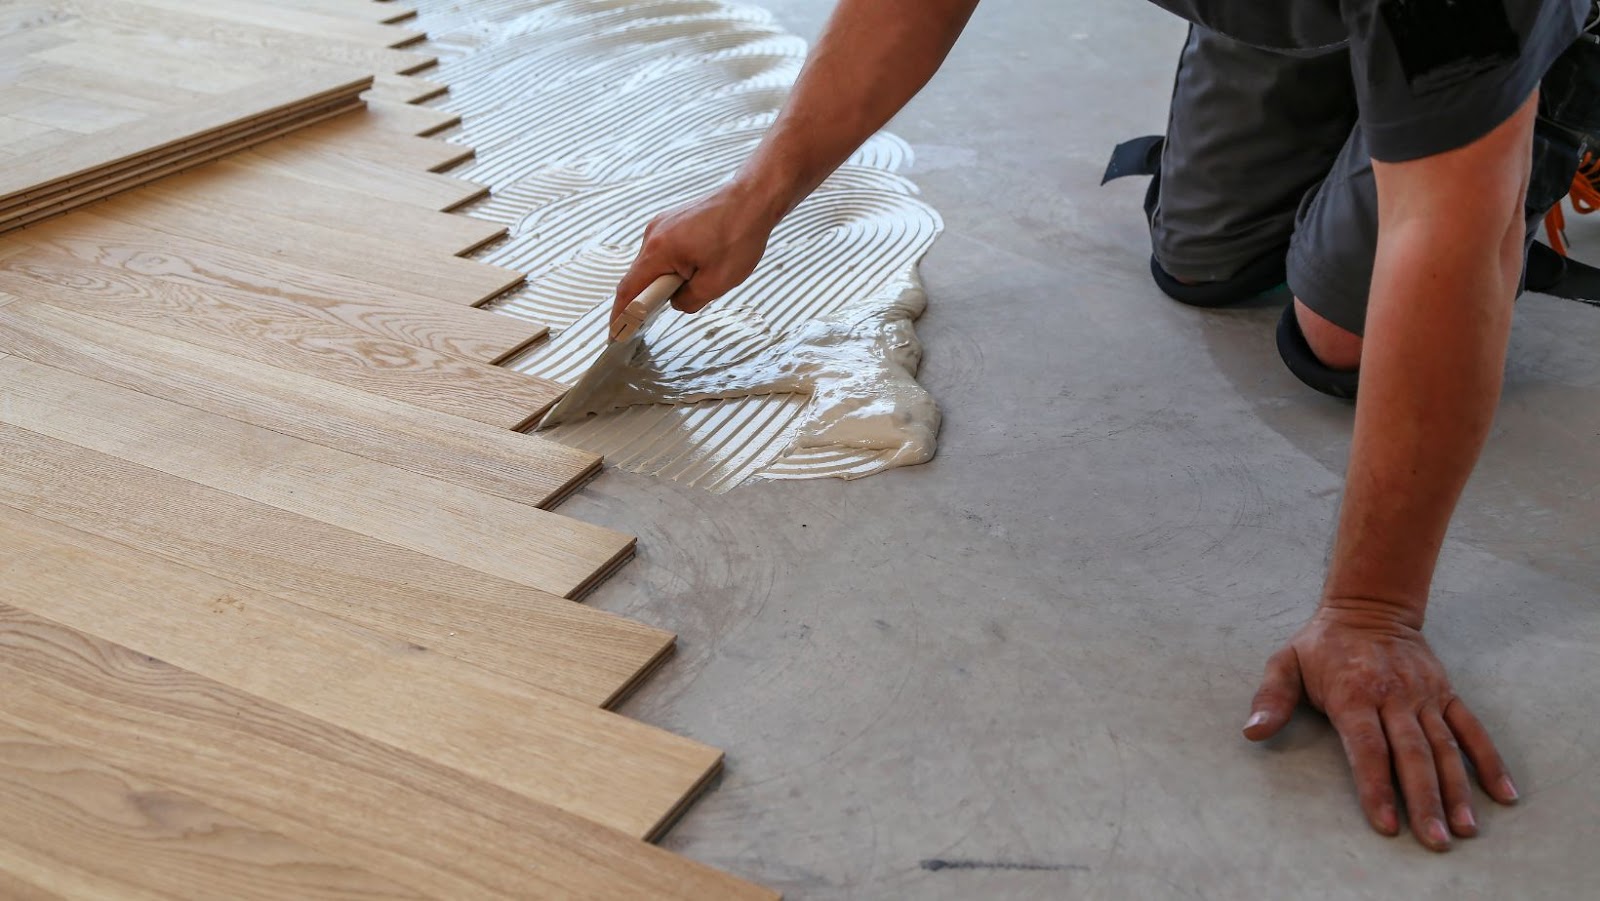
Installing laminate flooring can be done quickly, if you have the right tools. Before laying the laminate it is important to determine what type of underlayment you need. Most underlayment comes in rolls or sheets which can be found in various thicknesses. When choosing the right underlayment, it is important to consider factors such as the level of humidity, any potential sound problems and thickness compatibility with your laminate planks.
Once you have chosen the appropriate type of underlayment for your floor, lay it down over subflooring and cutting where necessary to fit around cabinets and doorways. Make sure that it lies flat against the subfloor with no bumps or other obstructions before proceeding to click-lock laminate into place. For this portion of the job a rubber mallet and/or tapping block will be necessary; typically a ¾” size mallet works best for most applications when installing a click-lock floor system.
Place the planks
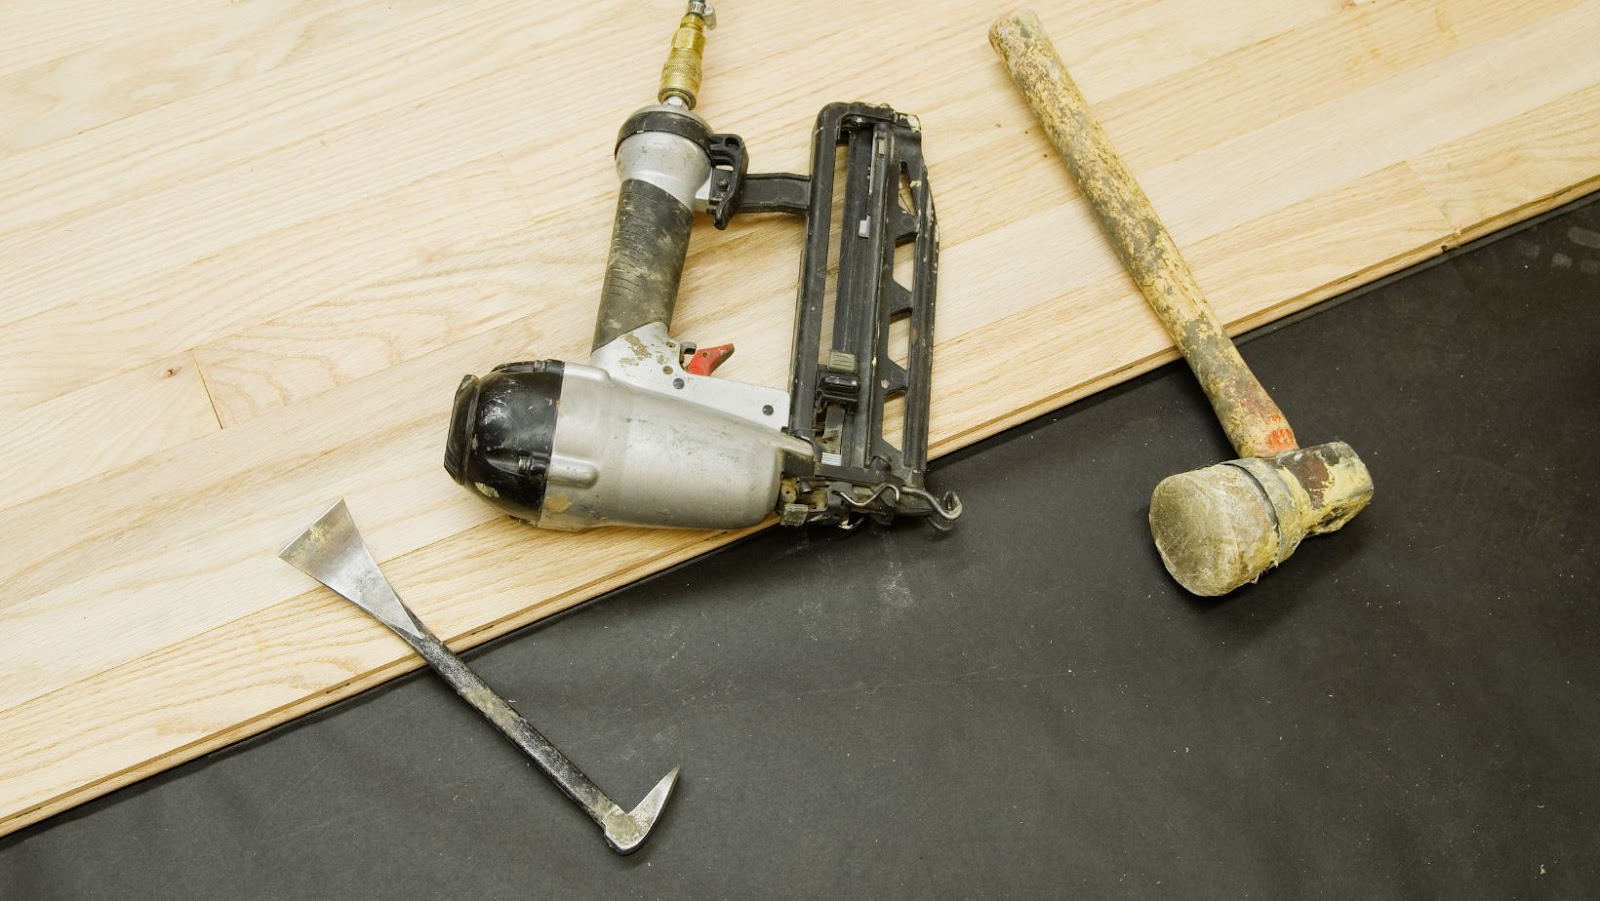
Installation of laminate flooring requires the use of a few tools, including a tapping block and a pull bar. It’s also helpful to have some extra samples, a power drill, drill bits, safety glasses, and a mallet. Depending on the type of flooring you have chosen and the thickness of the planks, you may need to use a different size mallet for installation.
Begin installation by laying out your planks in the room before adhering them to the floor. Place end pieces at walls or doorways as needed to create even butt joints along each edge of your floor. Place thicker planks at greater distances from walls to ensure proper expansion space when required by your product instructions. In general, you should allow ⅜-inch expansion space around all edges except against permanent fixtures such as stair cases or fireplaces so that wood or laminate can expand and contract with changes in temperature and humidity without buckling or splintering. For most laminates measuring less than 8mm thick, a regular 16-ounce rubber mallet should suffice for installation; for laminates greater than 8mm in thickness a larger 24-ounce mallet may be necessary. Note: always avoid metal tools when working with laminate as they can damage the product’s finish or scratch it while tapping it into place.
Secure the planks in place
Secure the planks in place once all of the flooring is laid. This can be done by hand-sealing each edge of the laminate planks, or for best results, you can use a mallet and presser foot tool to firmly lock them together. The most common size mallet for laminate flooring is a rubber-headed rubber mallet; this provides enough force without damaging the floors. Additionally, it’s important to keep in mind that if there is any adhesive between the planks during installation, it must be completely dry before locking them in place or else they could become warped over time.
Finishing
Once you’ve installed your laminate flooring, the last step is to finish it off. This involves ensuring that your flooring is level and secure, and that all the necessary pieces are in place to keep it looking great. You’ll need to use a mallet of the right size to do the job right. In this section, we’ll provide you with some tips for installing laminate flooring, as well as discuss which size mallet is best for the job.
Cut the planks to fit the room
One of the most important steps in installing laminate flooring is to properly prepare the planks. This includes cutting them to fit windows, doorways, closets and other alcoves. If you’re working in an area with significant turns or curves it will likely be necessary to make numerous jAGUAR cuts as well. The best tool for this task is a laminate floor cutter, but a circular saw works as well. When measuring the planks, try to leave yourself some wiggle room so that they don’t end up too tight against walls and fixtures.
In order to make clean cuts it is essential that you use the proper tools and techniques. Before using power tools make sure to take the necessary safety measures — including wearing protective goggles and making sure your work area is well ventilated — and secure the boards on your work surface with clamps or another securing method so they don’t move mid-cut. Once you have made your cut it is important that you round off any sharp edges using an appropriate type of sandpaper or sanding block — especially if young children will be playing on your newly finished floor! Once all cuts are complete it is ready for installation!
The tool you need for this part of the project will depend on what type of laminate flooring you’re installing; glue-down varieties require a standard hammer while click-lock types require either a rubber mallet (for floating installations) or a pull bar (for non-floating installations). For click-lock style floors specifically, we would recommend using a rubber mallet; rubber heads are Soft enough not to cause damage while being firm enough to ensure satisfactory installation quality each time
Install the transition strips
Installing the transition strips is the last step in completing the installation of laminate flooring. Transition strips are needed when a laminate floor extends to an area of a different height, such as a threshold to a room or doorway. These strips are also used for transition between two different types of flooring, such as hardwood and tile.
In order to complete this step, you will need to use tools such as a mallet and pull bar. The size of the mallet you need depends on how thick your transition strip is and usually ranges from 3oz (83g) up to 6-8 oz (170-225g). Once your transition strip has been cut to size and laid in place, use a hammer or mallet with its edge facing the floor against the tongue side of the strip until it touches down securely against the subfloor beneath it. A pull bar may then be used if extra force is needed in order to connect it properly with the new laminate planks. Once you have completed this step, your installation of laminate flooring is finished!
Clean the floor
Once you have the laminate flooring cut and laid in the right size and shape, it’s important to make sure the floor is clean before you begin installing. Most floors should already be vacuumed and mopped beforehand, but it’s a good idea to do a once-over with a broom and dustpan or a damp cloth in order to pick up any remaining dirt or dust that could compromise the effectiveness of the installation. This is especially important for areas where there will be large amounts of foot traffic, as you don’t want to create any dips or valleys due to ground-in debris. If possible, lay down protective coverings such as towels or plastic sheeting along walls and doorways where there may be various issues that prevent proper adhesion from occurring.
Maintenance
Installing laminate flooring is a great way to update any room and can be done by even the most novice of DIYer’s. However, it is important to remember that once you have installed your laminate flooring, proper maintenance is key to keeping your floor looking new for years to come. Here are some tips to keep your laminate flooring in tiptop condition.
Vacuum regularly
Vacuuming regularly is one of the most important steps for maintaining and preserving laminate flooring. To keep dirt from becoming embedded and damaging the floor, it’s a good idea to vacuum or sweep your floor at least once a week. When vacuuming, use the hardwood brush attachment to avoid scratching or dulling the surface of the floor. Vacuums with beater bars should never be used on laminate floors because they can create irreversible scratches and damage. If you are using a mop, be sure it is damp—not wet—to avoid soaking or warping your laminate floors.
It is also important to consider what type of shoes you are wearing while walking on your laminate floors. Hard-soled shoes, animal claws, and other rough surfaces can all scratch or scuff laminate flooring, so make sure that everyone in your household knows not to wear them inside! Furthermore, make sure any furniture you may have on top of your floors also has protective measures in place such as felt pads to minimize any possible damage.
To install laminate flooring correctly, a mallet is recommended which should be slightly smaller than the plank width minus 3 mm which will allow for expansion joints between planks. The size of the mallet should be determined by first determining the width of plank being used for installation; generally 10-14mm plank thicknesses are suitable for residential use and up to 20 mm thick planks may require a slightly larger size mallet depending on how much space there is between planks or boards after installation. For example: If installing 10mm thick plank flooring then an 8 – 9mm (approx) size mallet should be used whereas if installing 15mm thick planks then an 11 – 12mm (approx) size mallet would be recommended.
Clean spills promptly
When it comes to cleaning spills on laminate flooring, the best advice is to act quickly. Even with sealed floors, liquid can still seep into the seams and cause discoloration or damage. Clean up any spills as soon as possible with a damp cloth or mop and mild detergent or lemon juice solution. Be sure not to over-saturate the floor – use only enough solution to clean up the spill and no more! When installing laminate flooring, you will need a mallet of appropriate size. The rule of thumb is that it should be no bigger than 18 oz with a wooden or rubber head. If the mallet head is too hard, you can damage click-lock laminate planks. If a mallet isn’t big enough it won’t provide enough knocking power to properly fit the planks together resulting in uneven joint gaps. It’s important that you choose a mallet size that evenly fits your specific needs for installing your laminate flooring without overdoing it.
Use protective mats and rugs
In order to protect your flooring from scratches, spills and other common forms of damage, it is important to make use of protective mats and rugs. Floor mats are typically placed at the entrance of a room to protect against water, dirt and debris that can be tracked in from outside. Anti-fatigue mats are also available for areas where you will be standing for extended periods of time, such as in front of a kitchen counter or stove. Additionally, area rugs are an attractive way to cover up unsightly floor stains while simultaneously providing style and comfort underfoot. Choose quality materials that can withstand foot traffic as well as spills and dirt accumulation over time.