Building a brick BBQ with a chimney requires a lot of materials. Before you get started, it’s important to make sure you have access to the right tools, equipment, and materials in order to complete the project. In this section, we’ll break down all the materials that you’ll need for your brick BBQ with a chimney. There are a few things to consider when putting together a list of items, such as the type of brick and mortar you’ll use, as well as accessories like a chimney cap and flue. Let’s take a look.
Bricks
Bricks are a great material for use in a DIY brick barbeque. Bricks provide strength, fire resistance and can be made to look aesthetically pleasing. For the main structure of the barbeque, medium or large format bricks will be required; these are often available at home improvement stores or online retailers such as Boral and Claypave. Alternatively solid concrete blocks can also be used but should not be used for areas where direct flame contact occurs (such as the topping slab).
Bricks within the construction should be joined using either type N or S mortar according to their intended use within the structure. Type N mortar is suitable for light construction areas and should not come in contact with any heat sources; while Type S mortar is suitable for higher tension connections that are likely to come into contact with high temperature flame sources (such as around an oven door).
The chimney of the BBQ should also be made of bricks. The same types of mortar mentioned above are also applicable here when connecting masonry around a flue pipe. It is important that your chimney has an appropriate number of flue chambers and correct internal design to draw smoke efficiently rather than back into the space occupied by oneself and others cooking on or near by it. Careful consideration must also be taken to correctly seal voids between pipe work, brick work and other materials during construction.
Cement
Before you begin building your brick barbecue with a chimney, you will need to get the right materials. Cement is an essential material needed for this process and it can be used as a construction adhesive and as mortar. To determine how much cement you need, it is important to consider the size of the project. Depending on how large your barbecue structure is, you may need anywhere from 4 to 10 bags of portland cement for proper construction. It is also important to note that using the correct ratio of sand to cement must be followed when mixing the mortar. Generally, a mix of 5 parts sand to 1 part portland cement yields best results when using brick or block structures. Once combined with water and mixed into a uniform paste, the cement mix should be used within 45 minutes in order for best results.
Fire Bricks
Fire bricks, also known as refractory bricks, are specially heat-resistant bricks that can withstand extremely high temperatures, such as those needed to construct a durable, long lasting BBQ with chimney. Fire bricks are made with fire-clay and are used to line the interior of the frame and outer shell of a BBQ. They may be more expensive than regular bricks but they possess tough characteristics that make them ideal for a BBQ application.
Fire Bricks come in various shapes and sizes — always check the manufacturer’s instructions for specific recommendations. The general rule is to use enough brick layers to achieve an insulated thickness of at least 3 inches (7 cm). A common ratio for fire brick layering is two thin and four thick for exterior walls (or four thin/four thick for interior walls). When making the foundation it’s important to trowel mortar between each course, to evenly distribute weight. For maximum durability and longevity use heat resistant or refractory cement between each course of bricks. This will help block air currents from infiltrating the structure and prevent premature deterioration from the cold weather or hard winds.
Sand
The use of sand when building a brick BBQ with a chimney is essential for the success of the project. Sand is added around items that are embedded into the mortar, such as bricks and any other cement based components. It both provides stability by helping to reduce any surface tension that may occur as well as providing padding during the curing process.
For brick BBQs, sand should be sourced from a builder’s merchants or landscaping supplier and is usually made of finely ground silica or quartz particles. This type of sand should have a particle size between 0.5mm – 5 mm, and contain very little organic matter if found at all so as to not affect or decrease the strength of the mortar when combined with cement. Any organic matter that can be found will source from materials in during transportation such as small leaves and twigs, these materials must be removed before use through sifting or raking out any larger pieces before mixing takes place.
Mortar
Mortar is an essential material that needs to be used when building brick BBQ pits and chimneys. Mortar is a mixture of sand, cement, and water that holds the bricks together as they are joined. It is usually applied as a paste between each brick, allowing strength and safety in construction.
When selecting mortar for your project, be aware of the types on the market and choose the one that best suits your work. Masonry or Type S mortar is the most popular variety used for brick barbecues, because it sets quickly without shrinking or cracking in extreme temperatures, for example during cold winters. For strong adhesion and extra durability against abrasion, consider adding an additive like SuperKote 5000 Additive to your mortar mix.
Sand has a major impact on the strength of your mortar mix; coarse grade masonry sand works great for any deep digging or foundation excavations while fine grade masonry sand is optimal for plastering tight crevices between bricks. Make sure you use enough water while mixing it; if you add too little water then the concrete will become dry and susceptible to damage over time due to continuous heat exposure from barbequing fires.
Overall, choose materials carefully when creating a sturdy brick barbecue with a chimney — their quality will directly affect just how long your enjoyable barbeque process remains safe!
Chimney Flue
Assembling and installing the flue of a brick barbecue with a chimney is key to ensuring safe and effective operation. Below is a list of materials that you’ll need to successfully install a flue:
-Galvanized chimney flue
-Tape measure
-Chalk line
-Chimney mortar mix
-Trowel
-Masonry drill bit
-Masonry screws
-Safety glasses
-Gloves
Once you’ve gathered all the necessary materials for the project, refer to your user manual for specific instructions on how to properly construct and install the flue. It is important to make sure that the seams between each component are sealed with mortar mix, as this will reduce any smoke leakage and will help prevent moisture from entering your home in case of rain or snow. Additionally, ensure that when installing screws into bricks or masonry blocks they are secured into masonry using an appropriate masonry drill bit. Following these steps carefully can save you time, money, and potential hazards in the future.
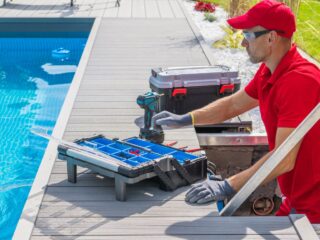
Tools
Building a brick barbeque with a chimney can be an enjoyable DIY project. While it is a major undertaking, it is also a rewarding experience. To complete this project, you will need to have access to the right tools and supplies. This section will provide you with an overview of the tools you will need to construct a brick barbeque with a chimney.
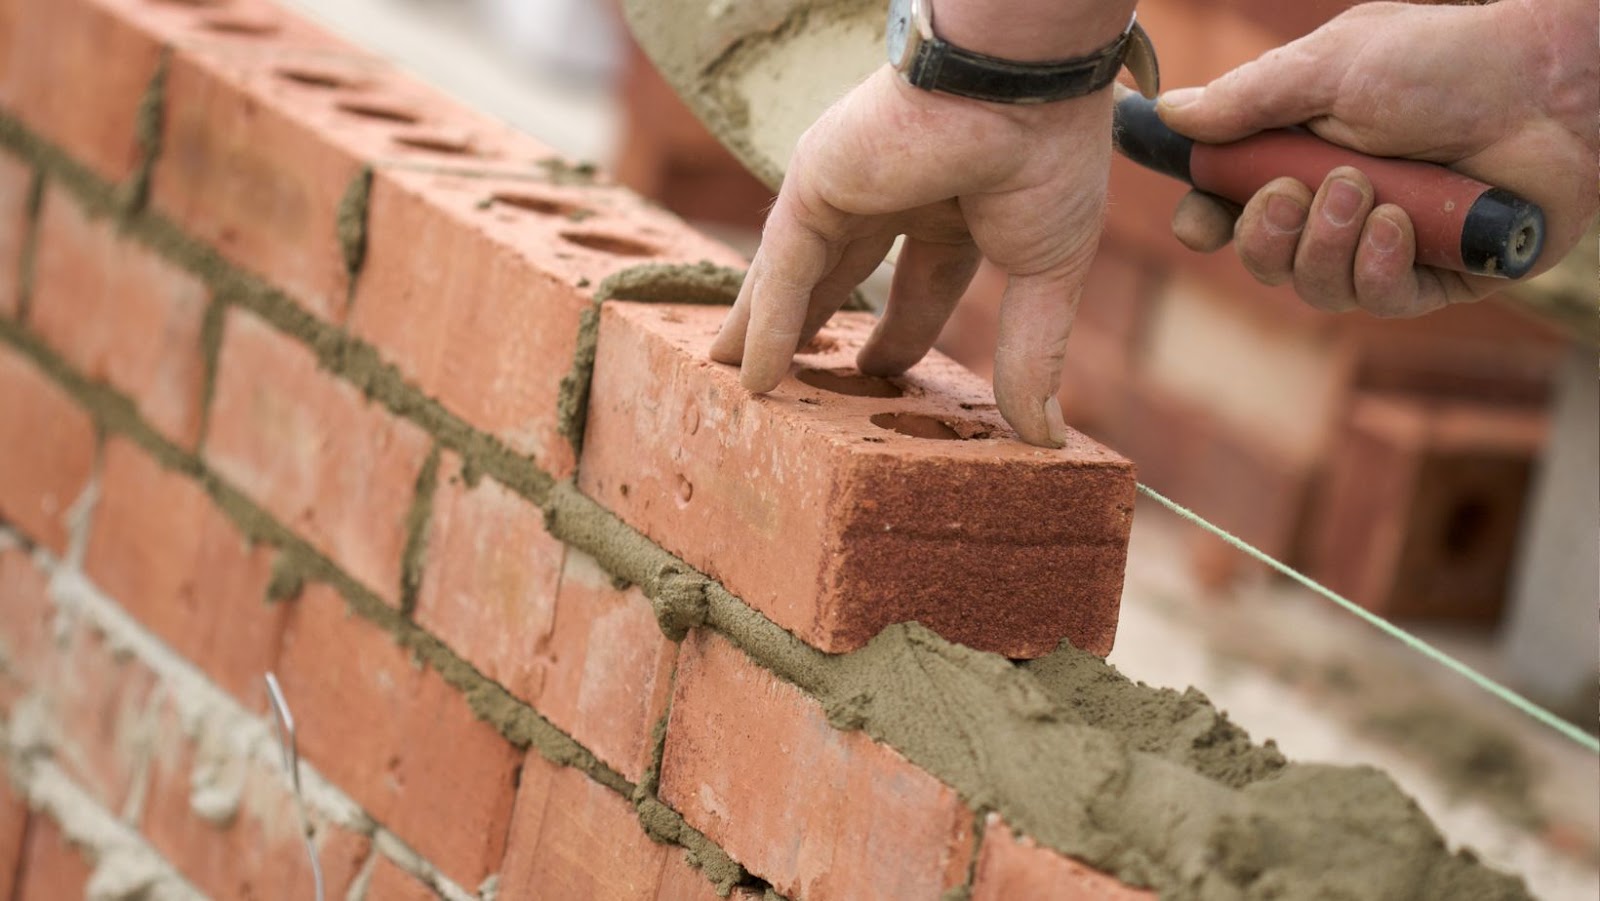
Trowel
A trowel is an essential tool for laying brick. The trowel allows you to spread mortar over the brick and position it correctly. Trowels come in several shapes and sizes, with some designed for finer tasks like working with joints and some designed for more coarse tasks such as thick layers of mortar. Generally, a standard-sized pointing trowel is suitable for any normal job when building a brick BBQ with a chimney. Before using the trowel, make sure it is clean of all dirt and debris, otherwise it could interfere with the work you’re doing. Be sure to buy one that has a comfortable grip so that your hand won’t tire easily over time!
Level
Before you start to build the brick barbecue with a chimney, it is important to create a level foundation on which the barbecue will ultimately sit. Leveling ensures that the construction will not look uneven or crooked when completed and ensures that it is stable as well.
To level the surface for your brick barbecue, you will need to gather the following materials and tools:
-A tape measure
-A long straight edge
-A spirit or bubble level
-Shovels
-A rake
-Sandbags of topsoil
-Plywood or lumber for forming edging -At least three stakes to anchor supplies -String for equal spacing of bricks -Masonry spikes to secure edging boards in place during construction.
Once all of your materials are gathered, use them to smooth out the area where your BBQ with chimney will be built. To ensure accuracy, use your tape measure and straight edge tool to confirm that everything is even and flush. After this is completed, if necessary add additional soil beneath as needed using sandbags until it adequately levels up. Then insert stakes into each corner of the area and string between them in order to mark out a rectangular surface area where you want your brick bbq with a chimney to sit.
Hammer
The first tool you should acquire to build a brick BBQ with a chimney is a hammer. Hammers come in many different shapes and sizes, so be sure to select the right one for the job. A regular claw hammer serves as a great all-purpose construction tool, especially when it’s complemented with a few other selections. Depending on the type of brick you choose, you may also need to purchase a masonry chisel and a bolster chisel for scoring the mortar bed and cutting the bricks into smaller pieces, respectively. You’ll also need a spirit level for checking your work in progress. When searching for hammers, keep an eye out for features such as drop forged carbon steel heads or ergonomic handles that will help reduce fatigue and ensure accuracy as you work.
Chisel
A chisel is an essential tool when building a brick barbecue with a chimney. It is used to shape, cut, and trim the ceramic materials while building the barbecue. The types of chisels to choose from include:
-Masonry Chisel: Used for trimming off small amounts of material such as stone, brick or concrete. This type of chisel has a sharp steel blade and comfortable handle which provides stability when in use.
-Cold Chisel: Used for struggling away mortar lines between bricks and for separating individual bricks without causing any damage. It is made from hardened steel and has an angled blade tip to aid with cutting through material.
-Tile Chisel: Used to cut shapes in tiles such as notches or holes for pipes and fixtures. They come in different sizes for many applications but all involve the same basic principle; hit the chisel’s flat surface with a hammer at an angle until the desired shape is achieved.
It is important that you use proper safety equipment when working with any tools but Be especially mindful when using sharp tools such as chisels as they have the potential to cause serious harm if misused. Unless you are familiar with chisels and know how they work it is best to ask advice from an expert before attempting any job utilizing them – in this case that could be your local professional mason or bricklayer who will be able to provide tailored guidance on which type of chisel could be most beneficial for the job you are wanting to complete.
Brush
One of the most important materials and tools you need to build a brick BBQ with a chimney is a brush. A stiff bristle brush is ideal for removing dirt, grime and dust from masonry walls, or mortar joints. This type of brush helps prevent gritty textures remaining embedded into the surface, giving it a cleaner and smoother finish. In addition, this should be done before grouting or applying the mortar so that the bond between bricks and masonry wall stays effective and gives a stronger backbone.
Shovel
Using a shovel is an essential component of building a brick barbeque with a chimney. It is critical that the area selected for construction be dug out to a depth sufficient to provide support for your BBQ as well as allowing space underneath for ash and embers to be collected. The depth should allow approximately six inches of gravel to be laid at the bottom, then coarse sand (or other specified material), and finally the bricks for construction of outer walls.
The size of the shovel you choose depends primarily on the size of your BBQ construction project. A standard shovel or flat-blade shovel is suitable for most small projects, while larger projects may require square-head or trenching shovels. If building your barbeque on an uneven surface, use tools such as land scraper blades and pickaxes to level areas before using a shovel. When using higher impact tools, wear safety goggles and appropriate protective clothing such as steel toe capped boots and gloves in order to protect yourself from any potential harm.
For more in-depth instructions on constructing a brick barbeque with chimney, please consult instructional guides available from reputable sources such as ehow.com or other home improvement stores/websites.
Preparation
In order to build a brick BBQ with a chimney, you need to make sure you have all the necessary materials. This includes bricks, sand, cement, mortar, a shovel, trowel, line level, fire bricks, chimney flue, fire cement, and steel lintel. Knowing the materials that are needed before beginning the project is essential for a successful and safe build.
Clear the area of debris
Before beginning to build your brick barbecue with a chimney, it is important to clear the area of debris and vegetation. The area should also be leveled so that there are no high spots or low spots in the ground. This will ensure better stability for the structure and ideally provide an even heat distribution over the cooking surface. Choose a spot for your barbecue that is in a well-ventilated outdoor space, is away from buildings or overhanging trees, and is out of direct sunlight during the hottest parts of the day. Once you have chosen an appropriate location, measure and mark out where you intend to build your brick barbecue with a chimney using stakes or string.
Mark the area for the BBQ
Before building a brick BBQ with a chimney, it is important to mark off the designated area for the BBQ. Consider how large you would like your BBQ to be and measure the space accordingly. Then, use stakes and string or landscape marking paint to outline the area. Once marked, double check that all measurements are correct and there is sufficient space around the perimeter of the barbecue pit. Gathering all necessary materials before beginning construction will help make the process easier and more efficient. The materials required can include bricks, mortar, sand, firebricks, a steel grill grate or cooking grills, and of course a chimney.
How to build a brick bbq with chimney
Building a brick BBQ with a chimney is a rewarding experience that will produce a great outdoor cooking station for many years. For this project, you will need to have a variety of tools, materials, and supplies to do the job right. In this section, we will outline the key supplies and materials you will need to complete the project.
Build the base of the BBQ
For the base of your brick BBQ, it’s important to build on a solid foundation. You will need to prepare a space for your construction that is level and has enough room for the length and width of the bricks you are using. Once this area is determined, dig down into the ground at least 2 inches lower than the desired height of your finished BBQ.
Next, pour 3-4 inches of gravel into the bottom of the depression for drainage and fill in around it with about 1-2 inches of cement followed by another 2-3 inches of sand. Make sure that all these materials are packed down tightly so they will support the structure’s weight when it’s complete.
You can begin to lay out your bricks into their desired design pattern on top of this foundation layer, keeping in mind how many layers you will need based on how high you want your finished barbecue to be. Be sure that each layer is slightly higher than the one before in order to create an incline that will effectively funnel smoke through its chimney. It is recommended that your grill be at least 28 inches tall with at least two layers of brick being used in its construction.
Before beginning work on constructing the walls, make sure your BBQ opening is framed firmly so that it does not shift or collapse during construction or use later on. Standardized units are usually rectangular in shape with measurements 10x18x28 inches; however you can adjust these measurements if needed according to the size of bricks and other materials purchased. Choose two side pieces and two end pieces made from noncombustible material such as metal pipe or steel lath (metal fabric used for plastering walls). Insert them into their own pockets formed by no more than 4 layers of brick laid perpendicular rising up from within the reach wall section as making them constable and impervious to heat or flame during use late
Build the walls of the BBQ
Building the walls of the BBQ can be a simple yet satisfying process. It is important to know that it gets progressively trickier as the size of the BBQ increases and also when you are trying to build it with masonry blocks instead with simple bricks. If opting for masonry blocks, make sure to use special cement for block laying, available from most hardware stores.
First, plan out where you want your chimney opening and set out a concrete footing for each wall of your grill. Make sure that the area is large enough and deep enough (150-250mm) for a solid foundation and if necessary, dig or trench and reinforce it with rebar or mesh reinforcement. Next, lay a base course of masonry blocks around 150mm high along the footing.
Once this is done, use mortar to join each block in place while keeping them level and consistent in height. Depending on what type of material you have chosen to build your walls with (masonry block or brick), you will need different types of mortar accordingly – Portland cement/Lime mortar mix or Fire clay mortar mix respectively being two common choices used when building brick barbecues like this one. Keep adding courses until you reach your desired height – making sure to keep a consistent height throughout as well as adequate space left for brick vents at regular intervals between courses (one vent per meter square).
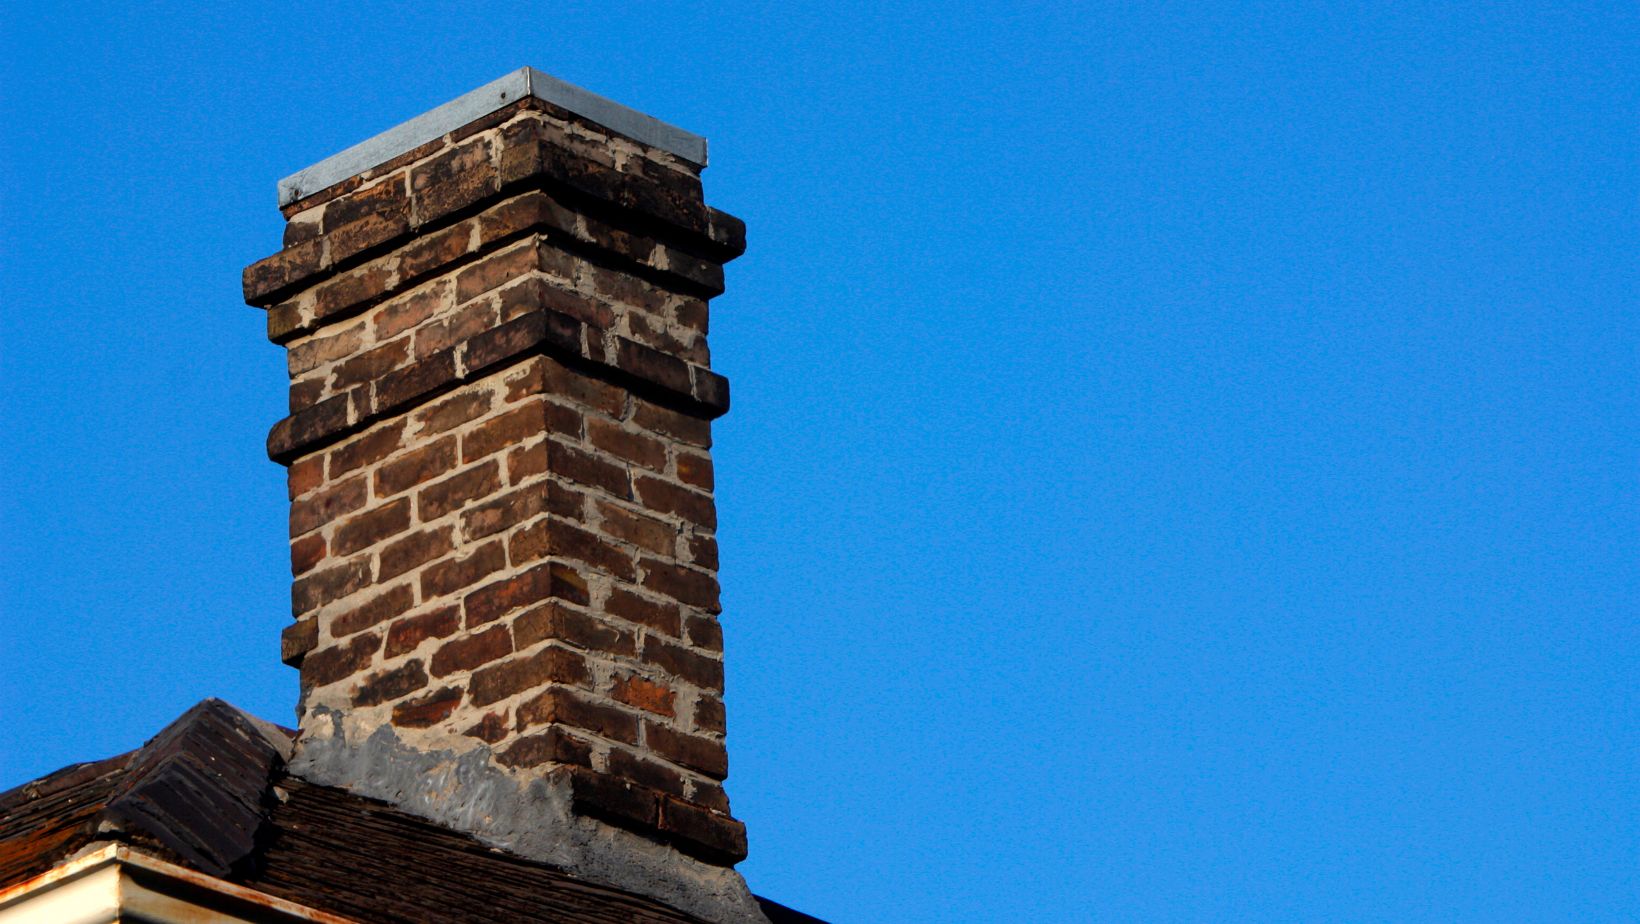
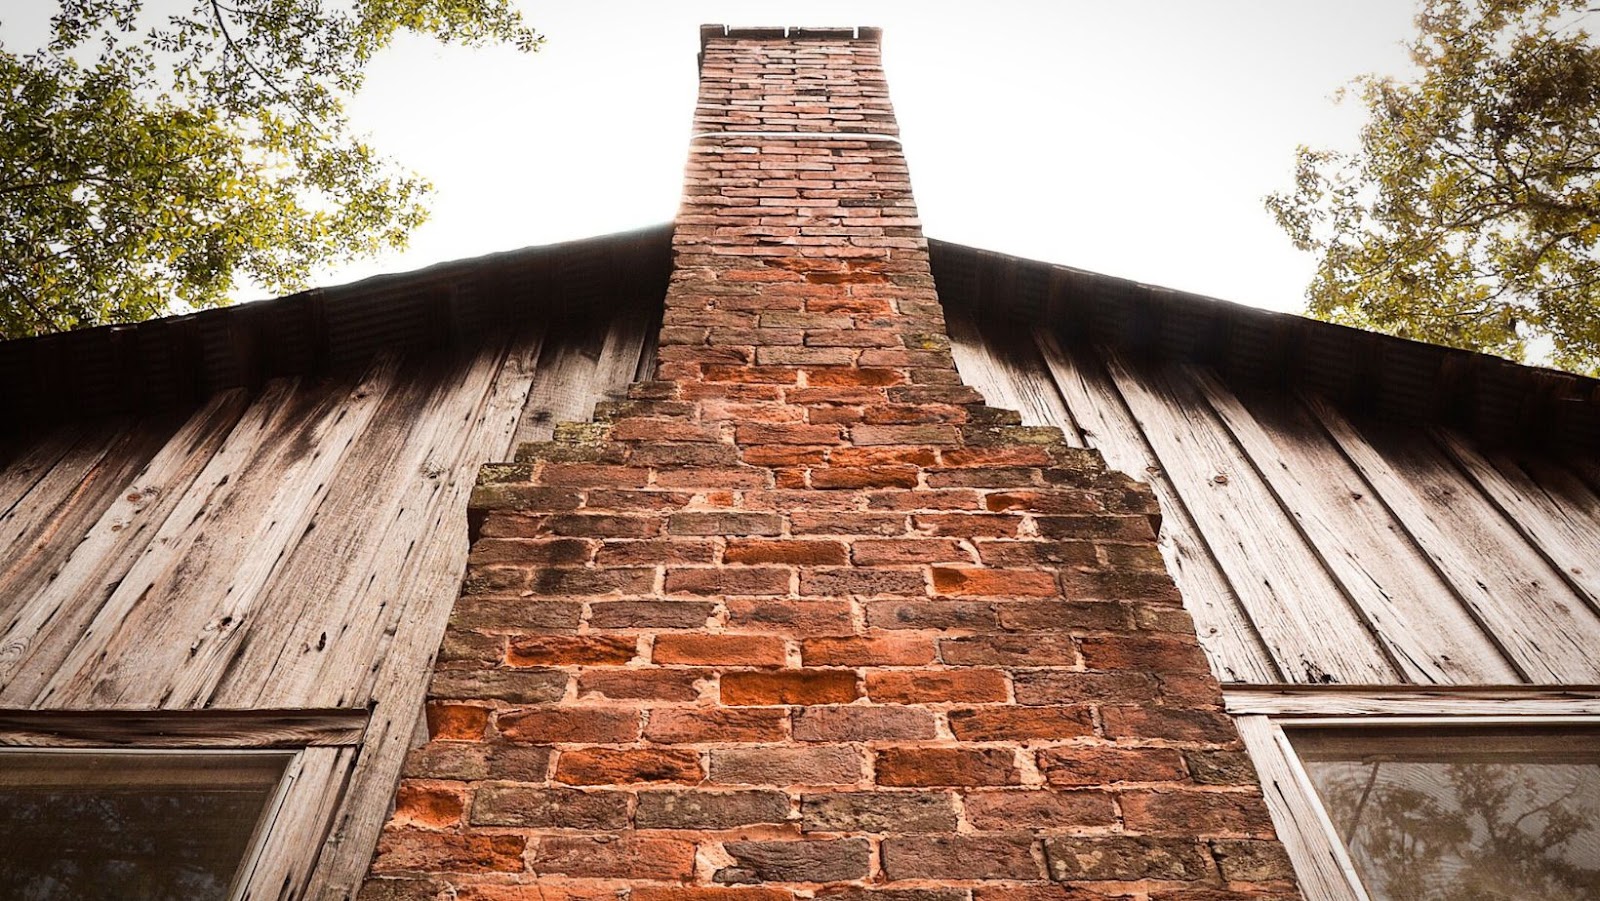
Construct the chimney
In order to build an effective barbecue chimney, you will need several materials. First, an appropriate type of brick should be chosen. Clay bricks are the most ideal for the construction of a brick barbecue with a chimney but fire bricks can also be used in the base. For a foundation layer at least two inches thick of gravel and sand should be laid out first before beginning to construct the walls and ultimately the chimney itself. A steel rod should then be placed in one corner as your guide for proper height. Afterwards, lay out alternate courses of bricks by stacking them so that they form steps allowing them to evenly bind as they go up ensuring overall structural stability. Mortar can be added between each course of bricks to further add strength and support when needed while allowing combustible gasses to pass through into the main chamber after lighting the grill. Once reaching the desired height, another steel rod can be used as your guide for finishing off the top section by adding protective caps or some other kind of decorative design if desired. Once complete, ensure there are no major gaps in order for any gas getting close enough to ignite safely when burning charcoal or wood logs as fuel source in your new brick barbecue/smoker with a chimney!
Install the flu
Installing a flue for your barbecue is an important and sometimes overlooked detail. The flu can be made out of metal, galvanized steel pipe, or masonry blocks. If using metal or galvanized steel pipe, measure the amount needed and cut with a cold saw or hacksaw. Check the length to make sure it will reach all the way through the chimney, and then secure it with screws and anchors. If you will be using masonry blocks, mark off two square sections in your chimney path that are slightly taller than your flue pipe and mortar them in place according to manufacturer’s instructions.
Once all of the masonry is installed and dry, insert the flue through both sections of masonry while making sure to support it from beneath. Apply a watertight sealant between your masonry blocks and flue, then secure it on either side by screwing brackets into place against each wall or by using wire clamps as needed. Finally, cover up any exposed areas of your bracketed or wired-in flue with additional mortar if desired.
Finishing
Finishing your brick BBQ with a chimney is the last step in the building process and involves various materials. You will need to have a selection of tools and materials to complete your BBQ, such as a trowel, sand, cement, bricks, and a damp-proof course. You will also need to choose appropriate sealants and grout to waterproof and finish off your BBQ. Let’s take a look at all the materials you will need.
Apply the cement
After completing the task of laying the bricks, cement is essential to make all of the pieces stay in place and adhere correctly. Applying cement correctly is one of the most important steps of creating a BBQ with a chimney. Begin by gathering your materials: ready mixed cement and water.
Step 1: Prepare a thin mixture using cement and water, stirring with a trowel until both ingredients are fully mixed. The more water you use, the thinner this mixture should be in order to spread evenly across your brick surface.
Step 2: Cover one brick at a time with a thin layer of cement, using the trowel to spread it evenly over each brick until all masonry surfaces are covered.
Step 3: Wipe away and excess mortar before proceeding on other bricks. Do this after each application as it will allow for thicker layers when building higher walls or structures connected to surrounding structures such as an arch or column. Ensure that each layer is even so that no gaps are left behind long-term use.
Step 4: Once finished with all surfaces, give 24-48 hours for everything to dry depending on weather conditions; otherwise, you can allow 48-72 for wet conditions such as rainy weather or extreme humidity (e.g., coastal regions). After enough time has passed, test your newly created BBQ by lighting some charcoal and enjoying!
Apply the mortar
Consolidate the surface of the support bed first with a mortar that is composed of eight parts sand and one part cement, applied horizontally along the surface with a trowel or putty knife. Let it dry for 12 hours before continuing.
Next, apply a plastic adhesive mortar to the inside of the bricks. It is also composed of eight parts sand and one part cement and should be mixed with plenty of water until it reaches a thick consistency like thick yogurt. Spread it evenly on each brick’s inner side, then stack up all bricks in finished walls for at least 24 hours and let them set undisturbed so that their cohesion will be more reliable upon completion.
Now spread a layer of adhesive mortar on the lower ten centimeters on the outside edge of each wall to form an intersection with your support bed (for example, your concrete slab). Move around your BBQ structure like this until you have attached each brick one after another along interlocked edges. Make sure all connecting surfaces are free from dust and dirt as this will maximize adhesion strength between spots then press all bricks firmly together so that they bond well, but don’t damage their exterior by overly compressing them against one another when completing construction work. Let dry for 24 hours before further construction work can commence.
Paint the BBQ and chimney
Once you’ve finished constructing the BBQ and chimney, it is important to paint the surfaces in order to protect them from the elements. Before you begin painting, make sure that all surfaces are clean and dry. You will also need to sand rough edges and fill any holes or cracks using a suitable filler.
In order for your brick BBQ and chimney to look their best, you will need to apply several coats of paint. Start by priming the surface with a metal primer or masonry paint which is designed specifically for brick. When applying primer, it is important that you cover all surfaces; don’t be too stingy with the primer as this will ensure that your paint coats go on smoothly. In addition, allow ample drying time between coats (typically 24 hours).
After priming, you can use any type of high-quality acrylic paint of your choice — even spray cans! Make sure you spread out your coats evenly so that no one spot receives too much coverage; multiple light coats are better than fewer heavy coats here. Once finished, allow sufficient drying time before lighting up your BBQ for the first time!
Install the flue cap
Installing the flue cap completes the brick barbeque chimney, protecting it from moisture, insects, and debris. Position the cap on top of the flue so that the base is flush with the exterior of your chimney masonry. Secure one side of the base with mortar and use steel strap ties to secure it to your chimney bricks on all four sides. To prevent water from entering through the seams in your mortar joints, apply silicone caulk around them in a two-dimensional pattern both horizontally and vertically to create a waterproof seal. Let the silicone caulk cure for a few days before lighting your barbeque grill for safety precaution. You may also consider using capping mortar or high heat refractory cement for added insulation and protection against cracking due to heat distortion at higher temperatures.