You’ve watched HGTV, you’ve done your research, and now you’re ready to tackle that old laminate flooring in your home. Removing glued down wood flooring is a more involved process than floating laminate but can lead to some great results. Before you begin, it is important to familiarize yourself with the tools needed as well as learn some techniques that can help make the job go smoother. The following information will help you understand how to remove glued down wood flooring and get ready for a gorgeous new hardwood installation.
Safety Precautions
Before attempting to remove any type of glued-down wood flooring, there are some important safety precautions to consider. This includes wearing the proper protective gear such as eye protection, a dust mask, and gloves. Additionally, it is important to ensure that the area is well ventilated and that any power tools are unplugged when not in use.
Following these safety steps can help ensure that the job is done safely and effectively.
Wear protective gear
Whenever you’re removing adhesive or any other hazardous material from a surface, it is essential to wear the proper protective gear. This includes:
- Safety goggles to protect your eyes.
- A cloth dust mask or N-95 respirator to guard against airborne particles and fumes.
- Gloves and clothing such as long-sleeved shirts, trousers and closed toe shoes.
If any of these items are not provided by the homeowner or renovation project manager, they must be supplied by the contractor before work begins. Be sure to keep all safety equipment on at all times during the job.
Ventilate the room
Ventilating the work area is essential when removing glued-down wood flooring. The adhesive used to secure it to the subfloor contains volatile organic compounds, such as solvents and resins, which cause health issues if exposure is prolonged. Proper ventilation is necessary to help protect workers by removing harmful gasses, dust and fumes during the removal process.
When removing glue down wood flooring, ensure that the work area has an open window or door and set up an exhaust fan in a window or doorway to draw out the contaminated air while creating a cross draft of fresh air. It’s also important to use fans and dehumidifiers to help keep the area dry during the removal process of glue down wood flooring. Wearing personal protective equipment such as respirators or at least a dust mask can also help to reduce exposure during some projects; such as hammering and sanding may produce large amounts of fine particles.
Preparing the Floor
Removing glue down wood flooring is a tricky and labor-intensive job. Before you begin removing the flooring, there are certain preparations you must make to ensure the job is done properly and efficiently.
This section will cover the steps you should take to get your floor ready for removal:
- …
- …
- …
Remove furniture and appliances
Before scraping the flooring, all furniture, appliances, and floor decorations should be removed to prepare the room for scraping. Heavier items that cannot be moved need to be secured with painters tape.
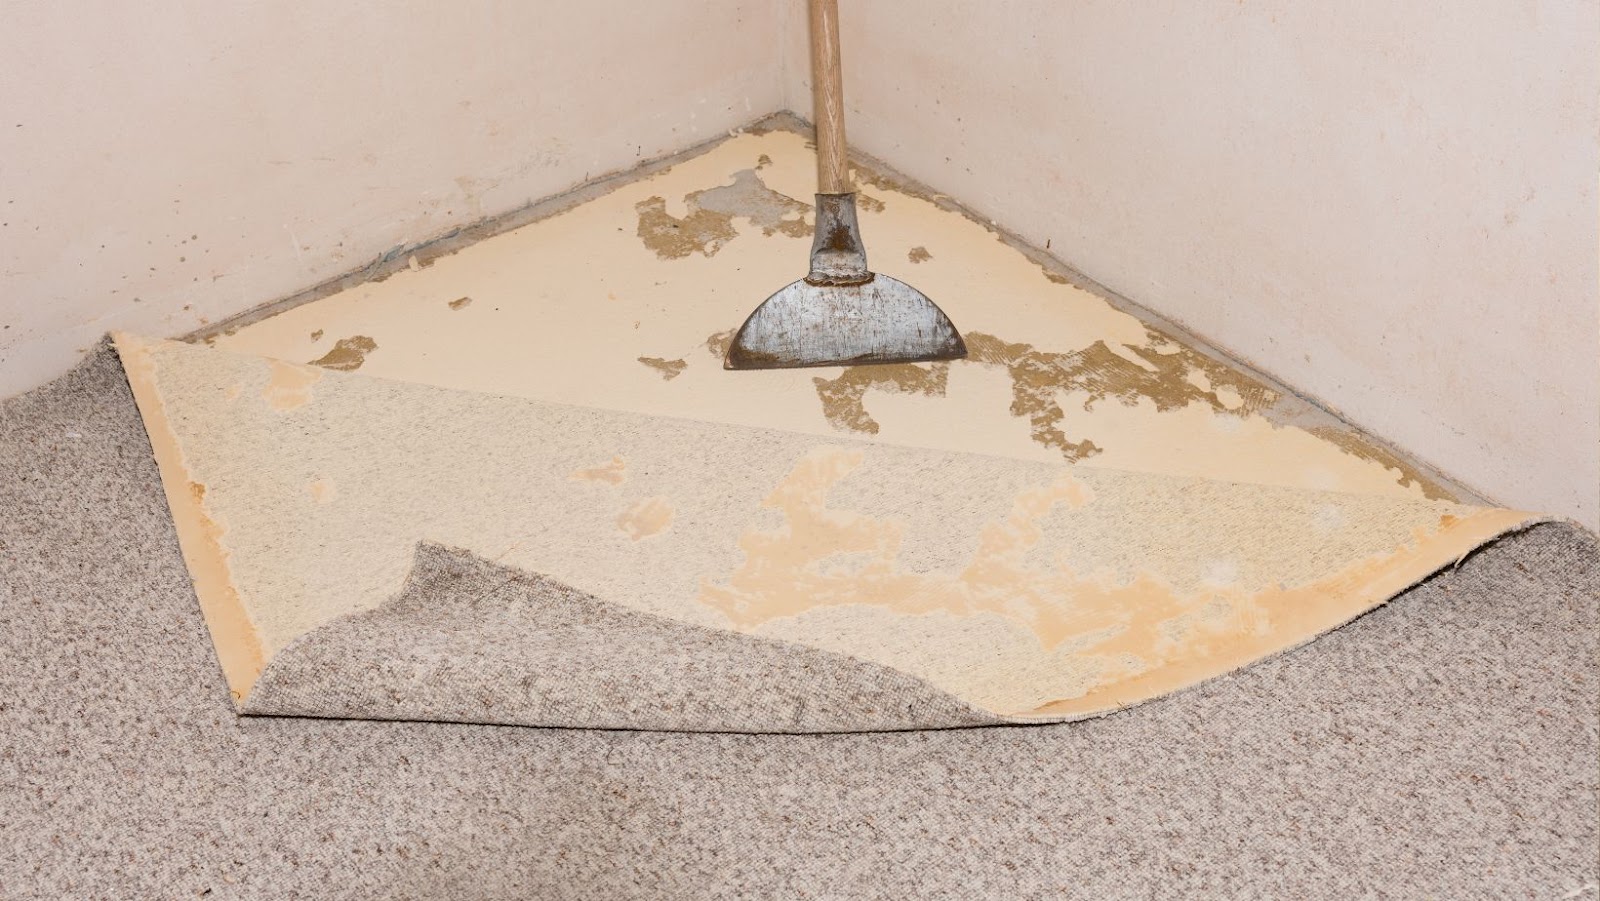
With all debris cleared from the area, it’s time to begin removing the wood flooring. Start by using a utility knife or other sharp object to score the edges of each board in order to loosen it from its adhesive. After each board has been scored on both sides of its perimeter, use a crowbar and/or putty knives underneath at an angle to gently pry up the planks from their base.
It’s important not to damage the plywood subfloor as you’re removing your glued-down planks – even minor gouges can lead to major problems later on. Use masking tape or other protective materials between any metal tools you’re using while prying up boards and ensure you are always wearing eye protection at all times while performing this task.
Once your floor is free and clear of any glue down wood planks, you can start preparing for your new floor installation!
Remove baseboards and trim
Baseboards, trim, and any other items fastened to the floor with glue or nails should be removed before you begin. Start by using a flat pry bar and a hammer to loosen and remove all the baseboards. Once the baseboards have been removed, check for any remaining nails on the subfloor. If you find any nails that need removal, use a nail punch to sink them below the subfloor surface.
Remove transition pieces such as divider strips and other decorative trim with a utility knife or saw. Be sure to wear protective gloves when working around wood flooring as it may contain splinters or sharp edges.
How to remove glue down wood flooring
Removing glue down wood flooring can be a tricky and tedious task. In order to do it properly, the right tools and techniques must be employed. It is also important to understand the type of glue used and which is the best way to remove it. This article will cover the different methods for removing glue and provide helpful tips for a successful flooring project.
Scraping the glue with a putty knife
Scraping the glue with a putty knife is one of the most effective techniques for removing undesirable adhesive substances from surfaces. This method works best when there are few gaps between the adhesive and the surface it is attached to. It can also work for larger sections of glue in which case patience and multiple passes with the putty knife may be required.
When using a putty knife to remove glue, start from a corner or small area that is easy to access. Place enough pressure on the blade so it cuts through the glue but not so much so that it damages or scratches the surface beneath. Carefully scrape away both thick and thin parts of glue in multiple passes, holding aside small chunks which often break loose between passes. Move across the surface in this manner until all visible traces have been removed.
After removing as much of the glue as possible with a putty knife, apply a solvent-based cleaner to help dissolve any remaining adhesive residue. Once you’ve cleaned off any remaining traces, rinse thoroughly with warm water and dry with a clean cloth or towel before applying any additional products necessary for finishing your project or repairing any damage caused by scraping off stubborn adhesive deposits.
Using a heat gun to soften the glue
Using a heat gun is the preferred method of removing adhesive from wood flooring. This technique softens the glue, allowing you to scrape and lift it away. To do so safely, you will need quality heating equipment and protective gear, such as safety glasses, silicone oven mitts, metal tongs and a sturdy metal putty knife.
To begin, set the heat gun to its highest setting. Aim the nozzle at one corner of the adhesive and begin to soften it in an overlapping zigzag motion across its surface. Work in small manageable sections about four square feet at a time. As you work your way around the room, be sure to keep your distance from the heated area so that you don’t burn yourself or damage any of the materials on the floor.
Once all of the adhesive is thoroughly soft, use your metal putty knife to scrape away small sections of it at a time until it’s all gone. If you find areas that aren’t coming up easily, repeat this process in those spots until they are ready for removal. With patience and careful attention to detail you should be able to remove all of your glued down wood flooring without causing any damage or harm in the process.
Applying a chemical adhesive remover
Once you have scraped away as much of the glue as you can, it’s time to apply a chemical adhesive remover. Depending on how thick and stiff the glue still is, any number of products may work. Generally speaking, two types of chemical products are available to remove and loosen the remaining glue; solvent-based and water-based removers.
Solvent-based adhesives will often loosen glue much faster than water-based products, but they may discolor paintwork or fabrics they come into contact with if used in the wrong way. A water-based product will likely take more time but won’t put other surfaces in your home at risk making this type of solution more ideal for many consumers.
The application method for both types of removers is simply a matter of pouring or spraying your chosen product directly onto the surface and allowing it to work on loosening up the remaining residue before trying to scrape it away again. It’s important to wear protective gloves when using these kinds of chemicals so that you don’t damage your hands or cause irritation; working in a well-ventilated area will also help prevent nausea or dizziness due to fumes created by some adhesives.
When applying any type of adhesive remover, always read the label to ensure you are using it safely and correctly before applying it onto your flooring materials or surfaces.
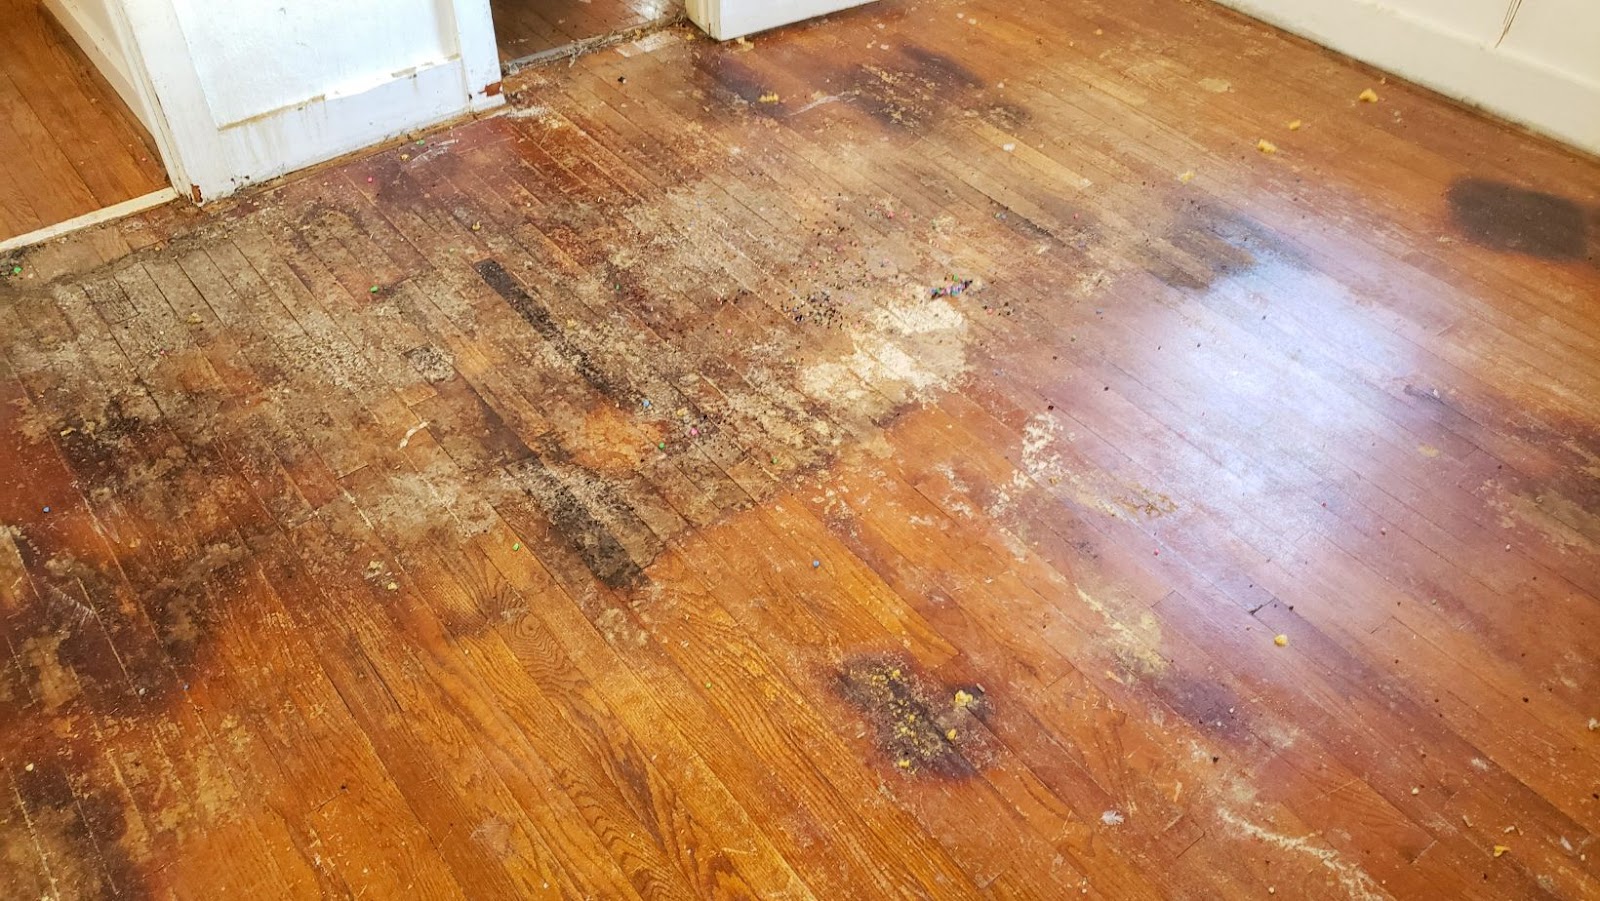
Cleaning the Floor
Cleaning your glue down wood flooring is a necessary step in keeping your floor looking and performing its best. Depending on the kind of glue down wood flooring that you have, there are different techniques and products to use in order to effectively clean your floor and remove any dirt, grime, and dried on glue.
In this article, we’ll discuss the different options for cleaning your glue down wood flooring and how to go about doing it:
Vacuuming the floor
Before using any type of chemical to remove the glue residue, vacuuming the floor is an important step in cleaning the floor. This will help remove dust, debris and grit that can get caught up in the glue down wood flooring. Use a soft brush attachment or use a stiff broom to sweep away dirt and debris from the surface.
Vacuum the area to be cleaned for both hidden dust and dirt particles that may be hiding under cabinets or furniture. Vacuuming will also help when it’s time to start scraping off the glue residue. Ensure that any area with adhesive is thoroughly vacuumed, so that there are no loose particles left on the surface before beginning your next step.
Washing the floor
Once you successfully scrape the adhesive from your wood floor, you will be ready to start washing your floor with the proper cleaners. This step is essential since it will help remove dirt, debris, and excess glue deposits that are still stuck to the wood. It is important to use the right cleaner for hardwood floors because many popular household cleaners are actually not safe for use on hardwood floors.
For best results, choose an oil-based cleaner made specifically for hardwood floors, or a warm water and white vinegar mixture. Vacuum or sweep completely before applying any cleaning solutions, to ensure that all dirt and debris are removed. Then add 1/2 cup white vinegar to a gallon of hot water, mop it onto the floor using a slightly damp mop head and allow it to sit for 5 minutes before rinsing with clean water. If desired, you can also add approximately 1 ½ ounces of natural cleaning oil per gallon of hot water for additional cleaning power and shine.
Allow the flooring time to dry thoroughly prior to moving furniture back into place. For extra shine, buff your floors with an old t-shirt or cheesecloth after they have dried completely.
Conclusion
In conclusion, removing a glue-down wood flooring can be time consuming and require a bit of force. However, if you prepare properly, use the right tools and follow the steps outlined above, scraping the floor is not too difficult. If you have never done it before and don’t feel confident in tackling the job on your own, contact a professional for assistance. With a bit of patience and the correct technique however, even an amateur can remove glue-down wood flooring with relative ease.