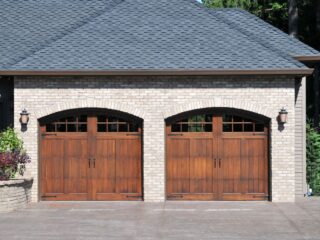
Choosing the Right Sliding Closet Mirror Doors
- Size and Fit: Measure your closet opening accurately to ensure a proper fit for the sliding doors. Consider both width and height measurements, as well as any obstructions such as baseboards or trim that may affect installation.
- Style and Design: Sliding closet mirror doors come in various styles, from simple frameless designs to more elaborate framed options. Consider the overall decor of your room and choose a style that complements it seamlessly.
- Mirror Options: Decide on the type of mirror you prefer for your doors. There are different options available, such as clear mirrors, tinted mirrors, or even frosted mirrors for added privacy.
- Frame Material: The material of the door frames plays a significant role in both durability and appearance. Common materials include aluminum, wood, or composite materials like MDF (medium-density fiberboard). Choose a material that suits your preferences and fits well with other elements in your space.
- Hardware and Accessories: Pay attention to the hardware used on the sliding closet mirror doors. Look for smooth-gliding mechanisms that ensure easy operation over time. Additionally, consider accessories like handles or knobs that match your desired style.
- Installation Process: Evaluate whether you’ll be installing these doors yourself or hiring professionals for the job. If DIY is not your forte, it’s best to rely on experts who can ensure proper installation and alignment.
Sliding Closet Mirror Doors
When it comes to optimizing your closet space, sliding closet mirror doors offer a range of benefits that can transform both the functionality and aesthetics of your room. Let’s explore some key advantages of installing these stylish and practical doors.
- Space-saving solution: Sliding closet mirror doors are an excellent choice for smaller spaces or rooms with limited clearance. Unlike traditional hinged doors that swing outwards, sliding doors glide smoothly along a track, maximizing the available floor space in your room.
- Enhanced visual appeal: The addition of mirrors to your closet doors can instantly elevate the overall look and feel of your space. Mirrors create an illusion of depth, making the room appear larger and brighter. They also reflect natural light, helping to illuminate darker areas in the room.
- Convenient accessibility: With sliding closet mirror doors, accessing your belongings becomes effortless. Simply slide open the door to reveal your clothing and accessories neatly organized within the closet. Say goodbye to struggling with cumbersome hinged doors blocking access to parts of your wardrobe.
- Improved organization: The integration of sliding mirror doors into your closet allows for better organization and visibility of your clothing items. Mirrors enable you to easily assess how outfits look without having to step away from the closet, saving time during those busy mornings.
How to Measure for Sliding Closet Mirror Doors
When it comes to installing sliding closet mirror doors, accurate measurements are crucial for a seamless fit. Here’s a step-by-step guide on how to measure your space correctly:
- Prepare the tools: Gather a measuring tape, pencil, paper, and a level.
- Start with the width: Measure the width of your closet opening from wall to wall. Take three measurements: at the top, middle, and bottom. Record the smallest measurement as your final width.
- Move on to the height: Measure from the floor to the top of your closet opening in three places: left side, center, and right side. Again, note down the smallest measurement as your final height.
- Consider track clearance: Determine if you’ll be using an overhead or bottom track system for your sliding doors. Make sure there is enough clearance for smooth operation by measuring the distance between the top of your opening and any obstructions like light fixtures or molding.
Step-by-Step Guide to Installing Sliding Closet Mirror Doors
Step 1: Measure and Prepare the Opening
Start by measuring the width and height of your closet opening. Use these measurements to trim the tracks that came with the kit if needed. Ensure that the opening is clean and free from any obstructions.
Step 2: Install Top Track
Position the top track at the desired height above your closet opening. Make sure it is level using a level tool. Mark the screw hole locations on both ends of the track before securing it in place with screws.
Step 3: Attach Bottom Track
Next, attach the bottom track to the floor directly below where you installed the top track. Again, use a level tool to ensure it is straight before marking and screwing it into place.