
Building a corner closet is a rewarding and empowering experience. However, it does require the right tools and materials to ensure that your project is done correctly.
How to build a corner closet
To build a corner closet from scratch, you will need basic tools such as a saw, screws, nails, drill and hammer, as well as specific materials like wood, plywood, drywall, and closet organizers.
In this section, we will cover the tools and materials needed to get your corner closet project off the ground:
Measuring tape
A measuring tape is a vital tool for assembling a corner closet. You should measure the space where you are going to build your corner closet, in order to make sure that your materials are the correct lengths and sizes. Additionally, it is important to measure any angles or bevels that you need for your corner closet before you start cutting pieces so that they fit correctly. A steel measuring tape is usually the most efficient option when determining measurements, as it offers the most precise measurements and can withstand light wear and tear.
Other necessary items when putting together a corner closet include:
- Construction adhesive
- Strapping hammer
- Stud finder
- Cordless drill
Pencil
When embarking on a corner closet construction project, it is essential that you have the right tools to ensure that you can make accurate measurements. A simple pencil will be one of the most important tools. Choose one with a thick enough lead or graphite that will make clear marks when making reference lines on your material before cutting. Make sure your pencil has an eraser in case you need to make changes or corrections; this will save time for further adjustments and help give a professional finish.
It is also suggested that you use brightly colored pencils such as yellow or orange when doing detailed work, as these colors stand out against most materials more clearly than traditional blue or black pens. Pencil leads are also fairly easy to sharpen, allowing for precise line markings when constructing your corner closet frame.
Saw
When building a corner closet, saws can be instrumental in making precise cuts accurately and quickly. In addition, they also help with quick cleanups and finishes. Generally, when working on any kind of carpentry project you should be sure to have a few different saws.
Some of the most common and versatile saws include:
- Circular saw – This type of saw is typically used for crosscutting boards to length or width and can also be used for power miter cutting on short pieces.
- Table Saw – A table saw is best suited for ripping large boards to width with ease. It’s much more accurate than other handsaws and even circular saws because you’re riding over a table top instead of pushing a circular blade against your work piece, which can easily cause inaccuracies due to an uneven surface.
- JigSaw – The jigsaw is often used for making curved cuts or cutting shapes. It works by using an oscillating blade which goes up and down as it moves across the surface you are working on.
- Reciprocating Saw – If you need to make plunge cuts in wood or perform demolition work, then a reciprocating saw is the tool for you! This type of saw has a powerful motor that drives back and forth in small ranges as it moves along its cutting path — which makes it great for demolition projects where accuracy isn’t super important or when making just one big cut would take too much time.
- Handsaw – A handsaw is an invaluable tool when building furniture as it can provide close, precise cuts that other kinds of powered tools cannot replicate. Using a handsaw requires patience, skill, accuracy and most importantly practice; however once these are mastered they are incredibly useful in furniture building projects due to their portability, affordability and versatility when dealing with tight spaces where larger types of power tools won’t fit (e.g., inside doorways). Additionally, some specific types of handsaws such as dovetail or coping saws can be used for intricate joinery work on fine woodworking projects.
Hammer
A hammer is a basic tool that is used for pounding, driving, shaping and manipulating materials across many applications. Hammers are available in a range of sizes for numerous tasks. From small jewelry hammers to larger framing hammers, the weight and size of the head of the hammer determines its utility and speed in accomplishing particular jobs.
The most common type of hammer is made with two parts: the head and the handle. The head usually has either one or two faces with one face smooth or slightly curved while the other face may be textured or dimpled. Both faces can vary in size depending on function or task. The handle is designed to absorb shock when the head strikes an object. Handles are typically constructed with wood, fiberglass and steel varieties, each having their own pros and cons in terms of strength and durability.
Hammer uses include:
- Framing nails
- Masonry nail setting
- Driving stakes into soil
- Puppet stringing
- Stretch film production
- Stretching leather material for leather work projects
all tasks best accomplished using a reliable hammering tool. In addition to providing manual force for these specific jobs, some tools such as specialized demolition hammers provide additional features such as vibration control that lessen user fatigue during extended use periods. With many types of strength force from light duty nail strikers to heavy-duty multi-function tools like jackhammers that can drill through concrete foundations – there are endless uses for this important tool!
Screwdriver
A screwdriver is a tool used for driving screws into various materials such as wood, plastic and metal. Screwdrivers come in various shapes and sizes, depending on the type of screws being driven. Most commonly used are flat-blade and Phillips head screwdrivers.
Flat blade screwdrivers are used for general purpose screw driving, while Phillips head screwdrivers are designed to reduce cam-out or the tendency of the driver to slip out of the fastener when pressure is applied.
Screwdriver sets allow users to select from an array of differently sized blades and tips to meet their needs. For example, long handled screwdriver sets might include both short and long handles with multiple interchangeable heads that can be attached making it easier to drive screws in hard-to-reach places. Another specialized type of screwdriver set is an insulated or “safety” version that may incorporate insulated grips or covers which helps protect users from electrical shock when working near energized circuits or equipment.
Materials
Building a corner closet is a great way to add additional storage and maximize a small space. In order to build a corner closet, you will need to secure the right materials and tools.
This section will provide an overview of the materials needed to successfully build a corner closet. With the correct materials, you can easily construct a corner closet that will last for years.
Plywood
Plywood is a pre-manufactured panel that can be used to create a variety of structures, including shelves, drawers and walls. When building corner closets, plywood has several advantages. It is much lighter than solid wood, making it easier to install. Plywood is generally cheaper than solid wood and comes in many sizes and different thicknesses depending on the task at hand. This makes plywood an ideal material for constructing frames for corner closets. Plywood also has a smooth surface that makes it easy to paint or finish with other materials such as laminate or veneers.
As you begin your project to build a corner closet from scratch using plywood, make sure to gather the necessary materials needed for each step of the process:
Wood screws
Wood screws come in a variety of sizes and types, each designed to securely fasten two pieces of wood together. Wood screws are manufactured with different lengths, thread counts, heads, points and materials. It’s important to choose the right type of wood screw for your project.
When selecting a wood screw, look at the diameter or gauge size needed (often indicated on the screw head), its length (expressed in inches), and its thread count. Wood screws also come in various heads: countersunk/flush head, pan/roundhead, flathead/fillister head and oval or truss head – all of which are designed for slightly different purposes. Screws can also be divided into coarse-threaded Swiss pattern and fine-threaded woodworking screws which tend to work better with harder woods like oak or mahogany.
It is also important to choose the right material for your needs—steel or stainless steel are the most common choices; brass and other alloys may be used in some cases when longer life and durability is desired.
Nails
Nails are an essential part of building a corner closet. Nails hold your lumber frames together while they are being secured to the wall studs.
Choose quality nails that fit the size of lumber you’re using; the recommended nail sizes vary based on type and size of the board to be nailed. Generally, a shorter nail is best for light boards, such as 1/2” or 3/4” lauan plywood, while longer nails are needed for thicker materials such as 2x4s and 2x6s.
Use galvanized nails or stainless steel nails if you will be building outdoors; this will help prevent moisture from corroding them. Also, keep an eye out for different head styles that make it easier to drive them into harder woods.
Hinges
Hinges are essential components of any corner closet project. There are many types available, and all of them provide the same basic benefits: allowing the door to open while keeping the door in place. Before you purchase hinges, it is important to consider both the look and durability of the product.
For a classic look, opt for self-closing and self-latching hinges made of sturdy steel or brass. For heavier doors, consider selecting hidden hinges for added support and a sleeker appearance. Finally, make sure to size your hinges correctly – too small a hinge will leave gaps around your door frame, and too large might prevent you from properly mounting the hinge with adequate clearance. Additionally some options allow for the ability to adjust how much clearance is present between the door frame and the door itself when opened or closed, necessitating multiple pieces to be purchased if that type of adjustment is desired.
Door handles
Door handles can be used as both a functional and decorative element in any home. Choosing the right door handle material is important because it will affect how easily it operates, its overall appearance, and its durability.
The following list outlines some of the most popular materials used for door handles:
- Brass: Brass is a popular choice for both interior and exterior door handles due to its elegant appearance and durable nature. It’s corrosion-resistant which makes it perfect for bathrooms, but it can be pricey when compared to other materials.
- Stainless steel: Stainless steel is a more affordable option than brass but still retains the same level of durability. It’s available in various finishes, from bright polished to satin brushed.
- Aluminum: Aluminum is lightweight yet strong, making it an ideal choice for both indoor and outdoor door handles that may need to bear heavy loads or frequent use. It’s affordable, easy to clean and doesn’t corrode in humid or coastal climates with salt exposure.
- Wood: Wood offers an attractive natural look and is available in various colors and grains. Doors featuring wood handles are suggested for your interior doors since they won’t hold up as long against wet elements as metal or plastic would outdoors.
- Plastic: Plastic offers an affordable option with a variety of styles suitable for any aesthetic but tends to wear down quicker than other materials in terms of longevity.

Construction
Constructing a corner closet is a relatively easy process. Depending on the size, the materials you will need can vary, but there are a few basics that are good to have on hand such as plywood, screws, nails, lumber, and a saw. Building a corner closet can provide extra storage space for a room or hallway and can also be used as a decorative element in a room.
Let’s talk about the materials that are required for this project:
Measure and cut the plywood
Once you have determined the size of your corner closet and have identified what materials and tools are needed, it is time to measure and cut the plywood. Start by measuring out the height, width and depth of the closet. Then, use a straight edge to mark out on a piece of plywood where all four sides of the closet will need to be cut. For accuracy, use a square or ruler to establish straight lines.
Once all four sides are measured out, cut the pieces using either a hand saw or a power saw. If using a circular saw is not an option, you may need to rent one from local hardware store for use during construction. After cutting all four sides of your closet frame, smooth down any rough edges with sandpaper as needed for safety purposes. Now your plywood pieces are ready for assembly into your corner closet frame!
Assemble the frame
The next step in learning how to build a corner closet is to assemble the frame. To do this, you will need a few materials, such as plywood, low-expansion foam board, wood glue, reinforced cardboard corners, steel plates and screws.
Be sure that the plywood used for the frame is cut correctly – it should be two inches longer than the measurements taken to determine size of your corner closet. The low-expansion foam board will insulate the closet while providing stability.
After gathering your materials and cutting them correctly according to your measurements, you will use wood glue to adhere them together prior to screwing them down with reinforced cardboard corners. The steel plates and screws should be used for extra support when attaching the frame to your corner wall. Be sure that each screw penetrates at least 1/4 inch into studs within the wall for stability.
Attach the door hinges
Once the unit is assembled and set in its desired location, attach the door hinges according to the specific instructions for your type of hinge. Most hinges have a template that is placed over each hinge mounting surface so it’s easy to place the holes and screws perfectly. Attaching only one side of the hinge at this time makes it easier to make any necessary adjustments for creating a perfectly aligned door.
When both hinges are located accurately, check that corner closet doors open and close smoothly then finish attaching the other side of each hinge. Use wood glue, or a construction adhesive or mechanical fasteners such as bolts, screws, nails and washers to secure it if needed per instructions from the manufacturer. Allow glue or any other product time to dry before proceeding with next steps.
Attach the door handles
Once you have mounted the closet doors, it is time to attach the door handles. Start by measuring the positioning of the handle on the door by choosing where your hand will comfortably grip when opening and closing the door.
Once a measurement has been established, mark this position with a pencil. Next align one side of your handle where you marked on your door and use a drill or screwdriver to securely attach it in place. Repeat this process on the other side so that both sides are evenly lined up. You may want to consider using self-tapping screws or pre-drilling holes before securing the handles in place with screws, depending on how much weight you expect your doors to withstand.
It is important to check that each handle is level, so check with a leveler after drilling and make any fine adjustments necessary for a smooth operation and comfortable feel for your corner closet’s door handles.
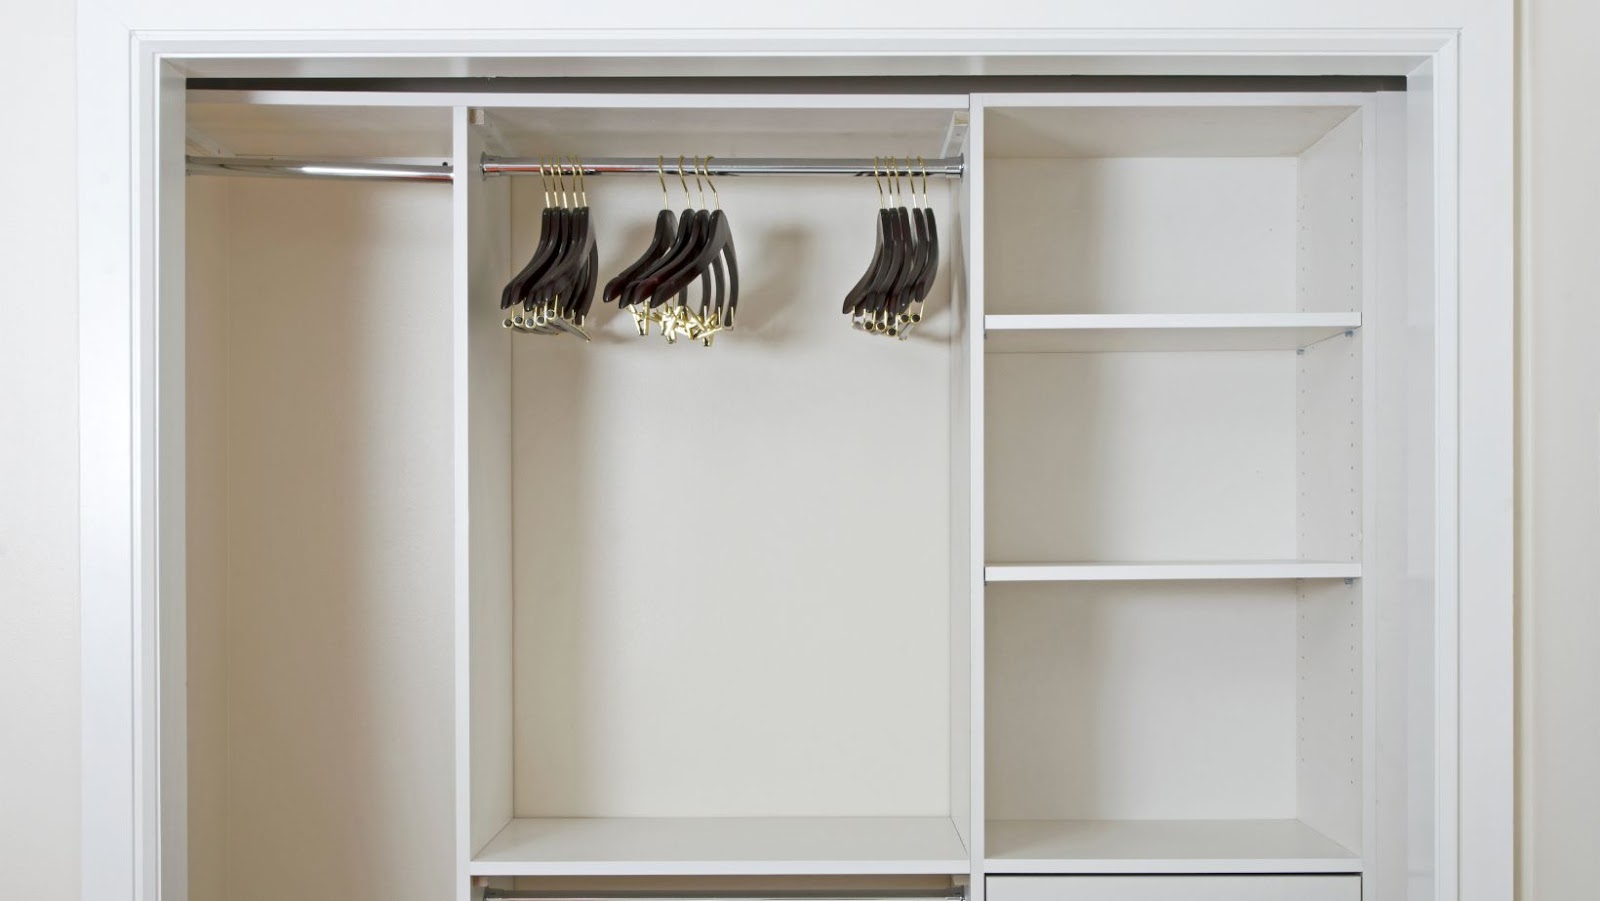
Install the shelves
Installing the shelves is one of the final steps in constructing a corner closet. Before you can proceed, be sure to familiarize yourself with any local building codes and guidelines to ensure that your shelves are well constructed and free of defects or hazards.
To begin, mark your desired shelf locations on the studs using a level and either a pencil or chalk line. Use a drill to install shelf mounting brackets near each marking, ensuring that they are securely fastened into the studs at each end. Once the mounting brackets are in place, slide your shelves over them. Make sure that they fit snugly into the bracket notcheswithout interfering with any other components in the closet space. Finally, secure the ends of each shelf flush against the sides of its respective mounting bracket with screws and finishing washers for added stability and protection.
Once all of your shelves have been affixed, add dividers as desired to create neat storage sections for folded clothing items or small items such as hats and bags. If necessary, you may want to finish off your shelves with adhesive backing for added support along the edges or corners to ensure long-term functionality of your corner closet.
Finish the closet
Finishing the closet requires you to prepare for the installation of the shelving, rods, and accessories. Begin by attaching tracks to the walls – you will use these tracks to hold different shelves and rods. Be sure to screw in at least two screws per track, into studs if possible, for a secure fit. When attaching tracks to masonry or concrete walls, use expanding anchor bolts or toggle bolts.
After measuring and cutting the shelving and rods, you can securely insert them into their respective tracks on the wall. If your closet design includes adding drawers or cabinets, follow the manufacturer’s instructions for mounting them in place.
The last step is to install any accessories such as shoe trees or dividers on racks and shelves of your corner closet. Depending on your design choice and materials used, you may also need to paint or seal doors and other surfacesinside your corner closet. Final touches like wallpaper may enhance its look further so make sure you properly acclimate any material before installation! Once installed in their right places enjoy going through your own built corner closet!