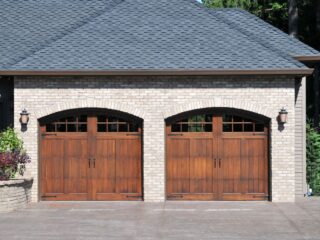
Removing bifold closet doors can be a simple and effective way to update the look of your space. Whether you’re looking to replace them with a different door style or want to create an open-concept feel, removing bifold doors is a task that can be tackled with a few basic tools and some patience. In this guide, I’ll walk you through the steps to remove bifold closet doors, providing clear instructions and tips.
To start, gathering the necessary tools for the job is important. Depending on how your doors are secured, you’ll typically need a screwdriver (either flathead or Phillips), pliers, and possibly a pry bar or putty knife. Once you have your tools ready, take some time to familiarize yourself with the structure of your bifold doors and identify any screws or hardware that may need to be removed.
How To Remove Bifold Closet Doors
To successfully remove bifold closet doors, having the right tools at your disposal is essential. One of the most important tools you’ll need is a screwdriver. When choosing a screwdriver for this task, consider the following:
- Type – Opt for a Phillips or flathead screwdriver, depending on the type of screws used in your bifold doors.
- Size – Ensure that the screwdriver matches the size of the screws you’ll be removing. An improperly sized screwdriver can damage both the screws and your door frame.
- Quality – Invest in a high-quality screwdriver with a comfortable grip to make the process easier and prevent slipping.
Measuring Tape for Accurate Measurements
Another essential tool when removing bifold closet doors is a measuring tape. Accurate measurements are crucial as they help ensure proper alignment and fit when reinstalling or replacing components. Here’s why a measuring tape is indispensable:
- Precision – A measuring tape allows you to measure specific dimensions accurately, ensuring that any replacements or adjustments are made precisely.
- Consistency – Consistent measurements help maintain uniformity throughout your project, resulting in aesthetically pleasing and functional outcomes.
- Avoid Mistakes – Taking accurate measurements minimizes errors and reduces the risk of costly mistakes, such as purchasing incorrect replacement parts or cutting materials too short.
Removing the Door Panels
To remove the bifold closet door panels, you’ll need to locate the screws that hold them in place. These screws are typically found along the edges of each panel and may be covered by caps or trim. Take a close look at the top and bottom of each panel and along the sides where they connect to the track.
Once you’ve identified the screws, gathering all necessary tools for this task is important. You’ll need a screwdriver that matches the type of screws used in your particular door panels. Having a Phillips head and flathead screwdriver on hand is always a good idea, as different types of screws may be used.
Using the Screwdriver to Remove the Screws
With your screwdriver in hand, carefully insert it into each screw, securing one of the door panels. Apply pressure with one hand while turning counterclockwise with your other hand to loosen and remove each screw. Take care not to strip or damage any screws during this process.
As you remove each screw, keep them organized in a safe place so they can be easily reinstalled later if desired. Consider using small containers or compartments to avoid misplacing any hardware.
Taking Off The Door Knobs and Handles
In addition to removing screws, you’ll need to remove any door knobs or handles attached to your bifold closet doors. This step is essential for achieving complete removal of the door panels.
To remove these fixtures, check for visible screws or fasteners holding them in place. Using a suitable tool such as a screwdriver or Allen wrench (depending on their design), carefully unscrew or loosen these attachments until safely detach them from both sides of each panel.