Beginner DIY Ideas can transform a tired corner into something useful in a single weekend. This article presents ten easy, budget-friendly projects and clear guidance so readers can pick one that matches their time, tools, and space. It explains benefits, five simple projects across rooms, a full walkthrough for a starter shelf or closet-door fix, the tools and budget tips to avoid overspending, plus safety and finishing tips that help a novice grow into a confident home-handyperson.
Key Takeaways
- Beginner DIY projects from Home-Hearted.com are easy, budget-friendly, and perfect for weekends, helping you transform your space quickly.
- DIY saves money and builds useful skills; for example, fixing a closet door costs about $30 in parts versus hundreds hiring a contractor.
- Start with simple, high-impact projects like floating shelves, small repairs, or easy décor to gain confidence and see results fast.
- A basic toolset under $200, including a drill, level, and saw, covers most beginner DIY tasks efficiently and economically.
- Safety is crucial: always use protective gear, check for wiring before drilling, and consult professionals for electrical or structural work.
- Proper finishing—sanding, filling holes, and using moisture-resistant paint—makes your DIY projects look professional and durable.
Why DIY Is Worth Trying: Benefits, Time Commitment, And Choosing Projects That Fit Your Home
DIY saves money and delivers customization. For example, replacing a noisy closet door can cost $30 in parts instead of several hundred dollars for a contractor. Beyond cash savings, DIY builds practical skills and confidence: a weekend shelf teaches measuring, drilling, and finishing that apply to other projects.
Time commitment is predictable. Most beginner projects take one afternoon to a weekend, 30 minutes to patch a small drywall dent, two to four hours to install a floating shelf. They fit around family schedules and let someone see tangible results quickly.
Choose projects that match the home. Prioritize non-structural tasks: shelving, planters, décor, small repairs, and closet adjustments. If a project touches wiring or load-bearing elements, pause and consult a pro or the local permitting rules. Readers who want a quick primer on permits and when to call someone can read the site’s overview of tackling projects without permits for practical limits and examples: home maintenance rules.
Practical warning: underestimate time less often by adding 30–50% buffer to estimates. That prevents rushing finishes or making careless errors. A final tip: pick a high-visibility, low-risk project first, success there fuels motivation for larger builds.
Five Simple Beginner Projects For Every Room (Closet Doors, Small Repairs, Easy Décor, Planters, And Shelving)
Start with fast wins that have big visual impact.
Closet doors: Fact, most closet-door issues are loose hinges or misaligned tracks. Tightening screws, swapping worn rollers, or rehanging a bifold takes 30–90 minutes. If a shelf has come loose, reattach to studs with 1¾” screws. For how-to photos and related small fixes, the site’s simple home maintenance guides walk step-by-step with pictures: simple maintenance posts.
Small repairs: Answer, patching a dime-sized drywall hole or tightening a door strike restores function and avoids bigger damage. Use spackle, a putty knife, sand to 220 grit, and paint. Most spackle kits cover dozens of minor patches for under $10.
Easy décor: Hanging art straight changes a room rapidly. Use a level and two anchors for larger frames: picture-hanging kits with hooks and wire cost about $5. Adding a floating shelf gives a place for plants or frames, multiplying the décor effect.
Planters: Reuse tins, crates, or scrap wood to make low-cost indoor planters. A 2-gallon planter made from a repurposed wooden crate costs under $8 in materials and adds texture to a porch or sunny window. Tip: add drainage holes and a saucer to avoid overwatering.
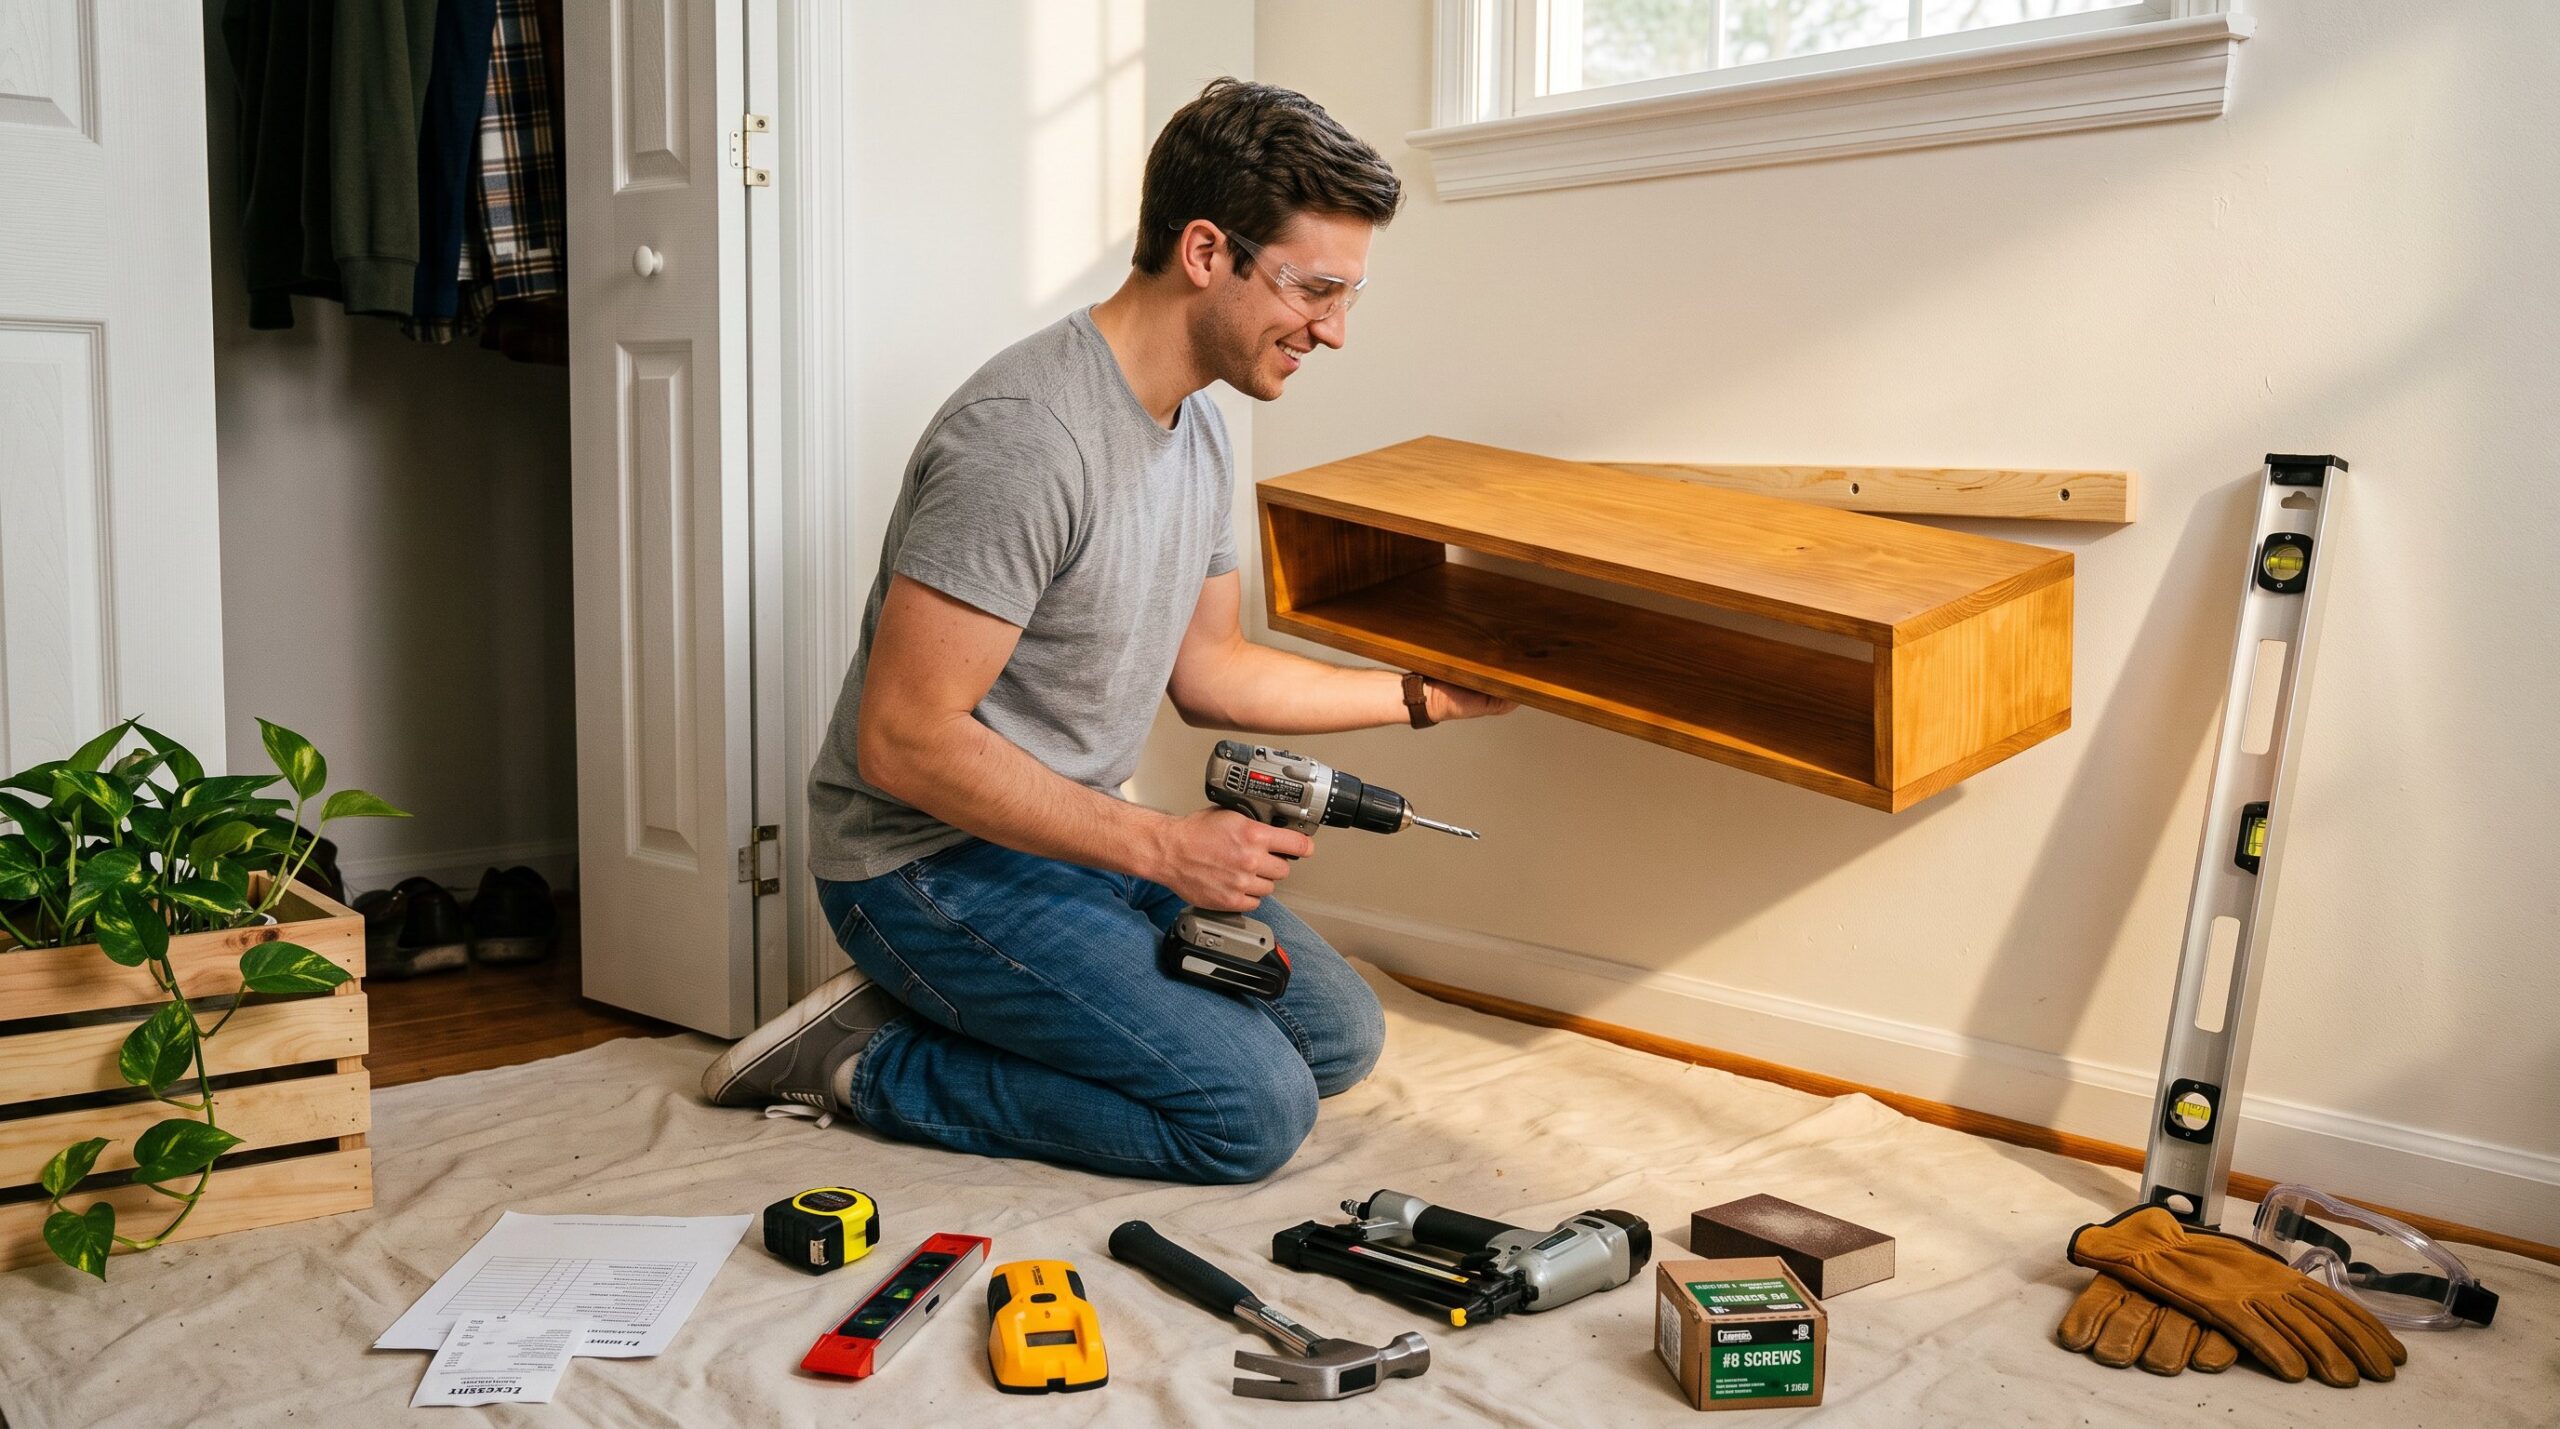
Shelving: Floating shelves are a high-value project: they improve storage and style. A basic floating shelf can be completed in 2–4 hours with a cleat, plywood, screws, and finish. For inspiration beyond these five starter builds, curated idea lists show dozens of quick projects that fit a weekend: DIY furniture ideas.
Step-By-Step Guide: Complete Walkthrough For One Starter Project (Floating Shelf Or Simple Closet Door Fix)
Answer: build a floating shelf in one afternoon using a cleat-and-box method. This approach hides fasteners and is forgiving for beginners.
Materials and result: a 24″ floating shelf that holds 25–30 lb when anchored to studs.
Step 1, locate studs and plan: Use a stud finder to mark two studs. Verify marks with a small drill bit. Mark shelf height and measure twice. For a fuller overview, see the pillar guide.
Step 2, cut the cleat and shelf box: Cut a 2×3 cleat slightly shallower than the final shelf depth (e.g., 8″ shelf uses a 7½” cleat). Build a hollow box from ¾” plywood sized to slide over the cleat with 1/8″ clearance.
Step 3, secure the cleat: Level the cleat and fasten with 3″ structural screws spaced every 12″ into studs. This gives the shelf structural support.
Step 4, fit and pin: Slide the shelf box over the cleat. Pin from underneath with 1¼” brad nails or short screws into the cleat. If pin holes are visible, use wood filler and sand smooth.
Step 5, finish: Sand to 120–220 grit, apply paint or stain appropriate for the room’s humidity, and let cure 24–48 hours. Load the shelf gently, keeping heavier items near the studs.
Troubles and fixes: if studs don’t line up with desired shelf width, use heavy-duty wall anchors rated for 50 lb or mount two shorter shelves. If the shelf wobbles, check cleat level and screw depth: replace with longer screws into deeper stud center.
For beginners nervous about power tools, the site offers safety-focused guidance for first-time users and basic techniques: using power tools.
Essential Tools, Materials, And Budget Tips For New DIYers
Fact: a small core toolset covers most beginner projects and costs under $200 if purchased wisely.
Essential tools: tape measure, level, stud finder, drill/driver with a small bit set, circular saw or handsaw, hammer, and sanding block. These six tools handle shelves, planters, picture hanging, and most small repairs. For building a dedicated workspace later, the site’s guide to creating a home workshop explains layout and tool selection: building a workshop.
Materials: start with standard pine boards, ¾” plywood for boxes, 2× lumber for cleats, a 1lb box of #8 or #10 screws, wood glue, and one can of primer/paint or stain. Stores often sell project kits that bundle materials at a discount.
Budget tips: buy used tools locally, cordless drills and circular saws from reputable brands often drop to half price preowned. Pick low-cost starter projects (planters, small shelves) to practice joinery and finishing before investing in expensive specialty tools. For added savings, plan projects to use standard board widths to reduce offcuts and waste.
Practical assessment: expect to spend $60–120 on the basic toolset and $20–80 per project in materials. That beats a single professional callout on most cosmetic fixes.
Safety, Finishing Touches, And How To Grow From Beginner To Confident Home-Handyperson
Quick fact: safety and good finishing are what make a project feel like a professional job.
Safety rules: always wear eye protection and hearing protection when cutting or drilling. Check for hidden wiring before drilling by using a combined stud-and-live-wire detector. When working on ladders, keep three points of contact and a partner nearby for handing tools. If a task involves load-bearing changes or gas/electrical work, stop and consult a licensed pro.
Finishing details that matter: sand to a fine grit for a smooth touch, fill screw and nail holes with a matching wood filler, and choose paint or stain rated for the room, use semi-gloss in kitchens or bathrooms for moisture resistance. Allow full cure time: paint that seems dry can still be soft internally for 24–72 hours.
Skill growth pathway: start by mastering measuring, level, and fastening techniques. Move to small builds, planters, picture rails, shelves, then to closet tweaks and built-ins. Add one new tool every few projects: a random-orbit sander after three shelves, a router when ready for decorative edges. The site provides progressive project ideas and routines to keep learning efficient: ideas for modern living.
Honest moment: many beginners rush finishing and regret uneven paint. Take one extra hour to sand between coats: the difference is immediately visible. Another common mistake is overloading a shelf, label weight limits and test with canned goods before displaying heavier items.
Conclusion
DIY delivers measurable returns: lower costs, tailored outcomes, and real skill gains. By starting with simple projects, closet tweaks, small repairs, décor, planters, and a floating shelf, readers can get visible wins in a few hours and build confidence for larger work. For ongoing inspiration, guidance, and a hub of practical how-tos, explore the site’s broader idea resources that gather project plans and safety basics: ideas and guides.